Black Lights
DIY 06 NightRunner Headlights
Original Write Up By 53 willys
First off I want to Thank DTR/DTC member "Boz007" For showing me the link
I also want to Thank DTC//DTR member "CRMRAM" for doing this before me..cause I would have been to scared to do it with out a "how to".
This Mod is pretty time consuming and unless you have some patience don't try it!!! you need to heat the light in the oven and slowly and carefully pry the black glue from the clear lens all the while trying to keep the glue warm so you don't break the lens or the black back AND not melting the light backs in the oven!!!!
This is a 8-24 hour job for everything paint, silicone and all!!!!
now on to the fun.......
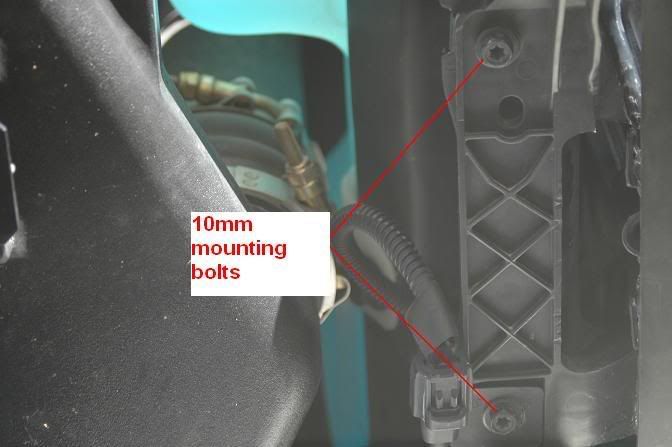
The first step is to take the headlights out, to get them out you need a 10mm socket of your choice..
take these two bolts out...
http://i81.photobucket.com/albums/j240/53willys/Dodge%20Stuff/DSC_0402.jpg
This is the inner fender
http://i81.photobucket.com/albums/j240/53willys/Dodge%20Stuff/DSC_0400.jpg
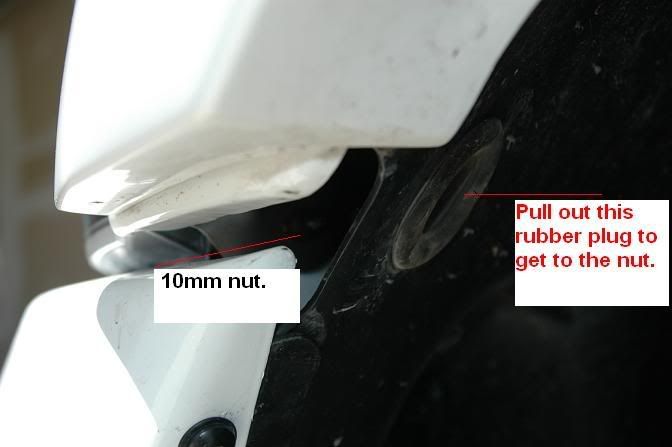
When the 2 bolts and 1 nut are removed you need to firmly pull the light straight forward to get it to pop out...when I pulled mine out the d-side light had a small guide stud that broke off...no big deal it went back together fine.
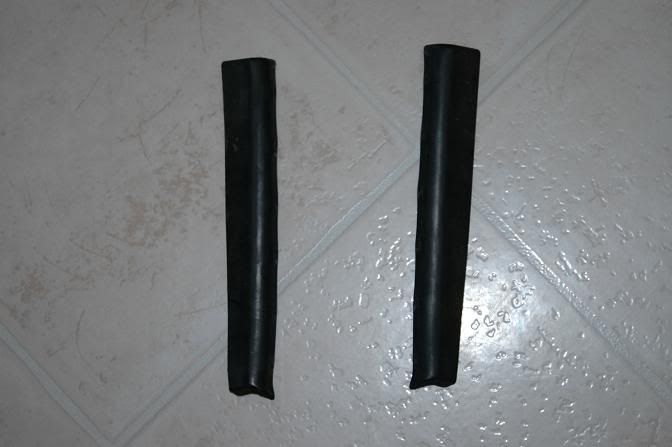
when you get the headlights out go inside and pre heat the oven to 375* Then take the rubber seal off the side of the headlight so it does not melt in the oven.
rubber seals..
http://i81.photobucket.com/albums/j240/53willys/Dodge%20Stuff/DSC_0389.jpg
now that the oven is warm you need a small flat head screw driver, putty knife, butter knife...of your choice. I used a flat head driver but after I did it I think a stiff butter knife or small wide screw driver would work better then the one I used. for this part you may want some gloves cause you will be pulling the light in and out of the oven.
Now put a light in the oven for about 2 min's..I used a timer.
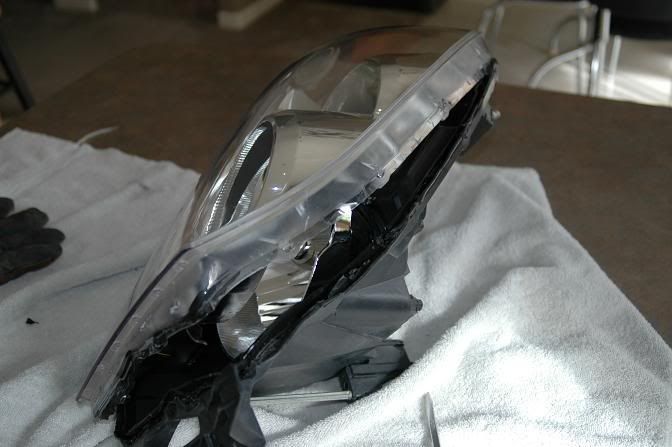
when you pull it out take your screw driver and gently and SLOWLY start to pry the light apart at the black and clear sections. THE BLACK GLUE WILL NOT MELT!!!!!!! SO don't keep heating the light thinking it will. you will melt the light housing....also don't get greedy!!!! take your time so you don't break something...I cant stress this enough.
As soon as you feel the headlight wont separate anymore put it back into the oven for 30-45 seconds. When you pull it out again separate it using the flat head screwdriver, you will feel and see the glue unstick from the clear section. Repeat this process until you can loosen the glue from the 2 pieces. One PRECAUTION,DO NOT put the headlight back into the oven until you CANNOT loosen the glue up anymore. Doing so WILL melt the headlight rear housing.
I think it is easiest to work from this corner/top first then make your way around.
http://i81.photobucket.com/albums/j240/53willys/Dodge%20Stuff/DSC_0343.jpg
http://i81.photobucket.com/albums/j240/53willys/Dodge%20Stuff/DSC_0342.jpg
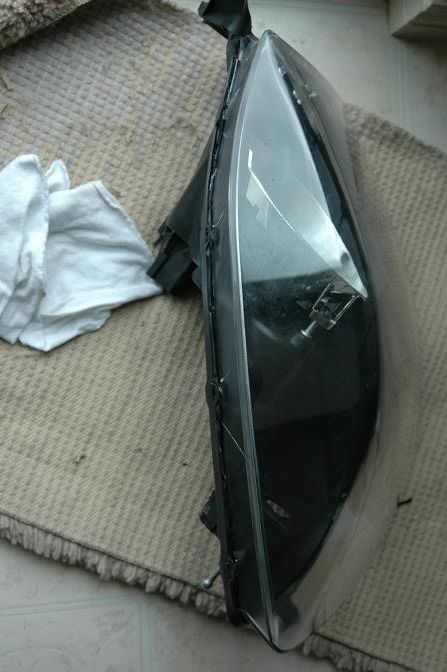
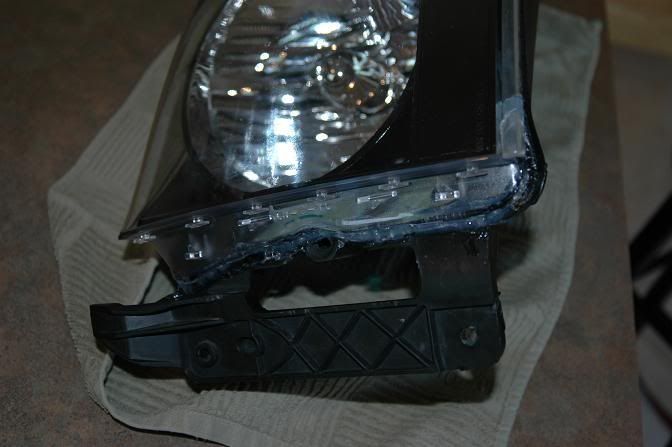
so after some choice words and some doubt this is what you get.
http://i81.photobucket.com/albums/j240/53willys/Dodge%20Stuff/DSC_0335.jpg
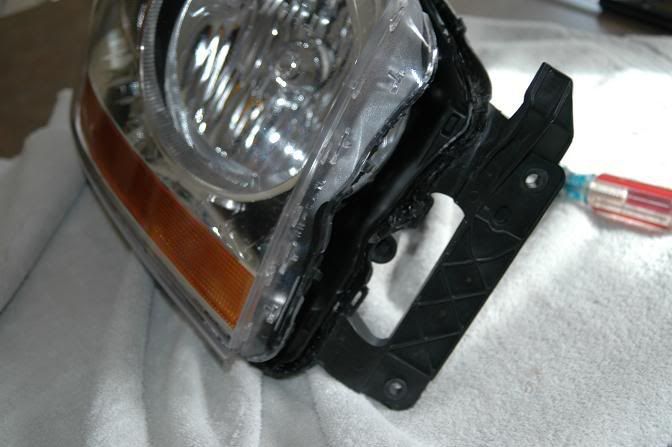
You end up really deforming the black housing but don't worry we will fix it later.
http://i81.photobucket.com/albums/j240/53willys/Dodge%20Stuff/DSC_0337.jpg
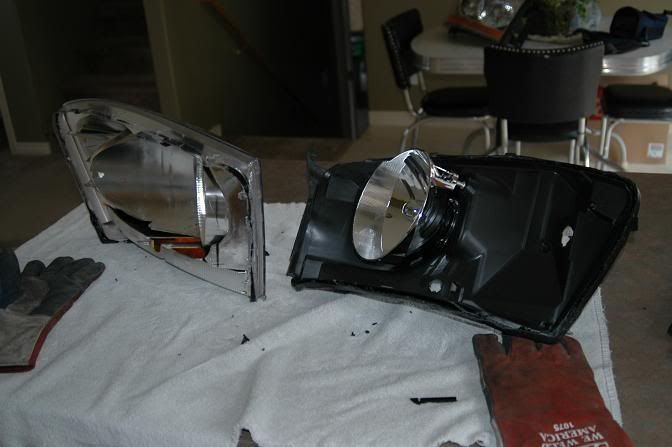
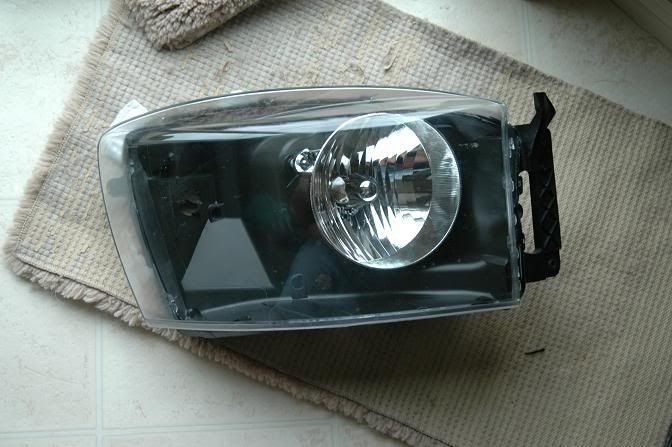
next you take the chrome headlight plastic out of the clear lens.
http://i81.photobucket.com/albums/j240/53willys/Dodge%20Stuff/DSC_0339.jpg
this was my first light and I GOT GREEDY. it is real small and it is just a "hangover piece" so I did not compromise the moisture seal..DONT GET GREEDY!!!! I was lucky.
http://i81.photobucket.com/albums/j240/53willys/Dodge%20Stuff/DSC_0340.jpg
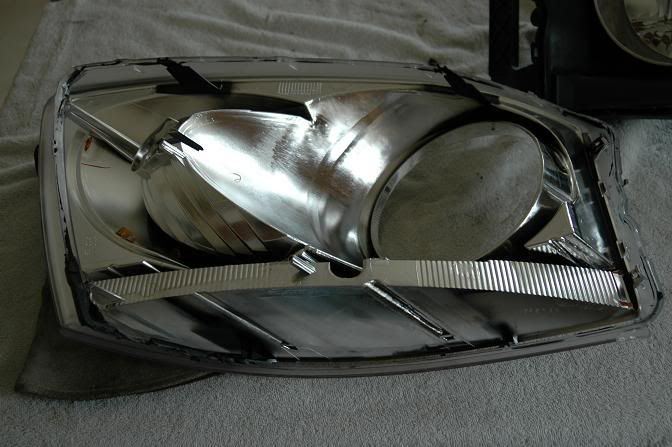
Now it's time to sand the chrome off.
I used "grey" scotch brite (aluminum grit)
http://i81.photobucket.com/albums/j240/53willys/Dodge%20Stuff/DSC_0349.jpg
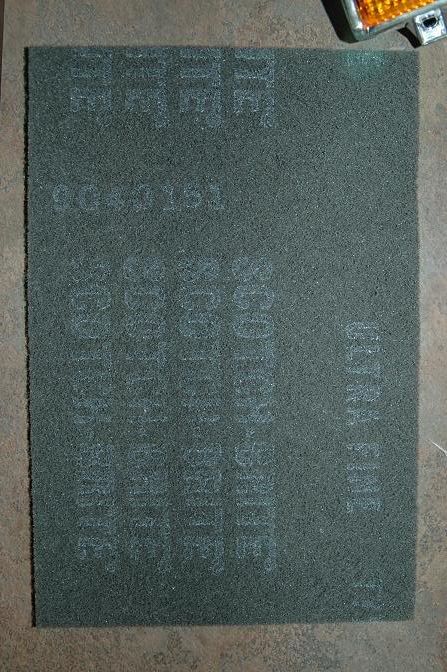
This a tip I think would be useful to know and that is tape off all the chrome BEFORE you sand the housing.
if you accidentally hit the inside of the light with scotch brite it will pull the chrome off when you pull the tape off!!
make sure you don't paint the inner part shown taped off below..other wise you may lose some headlight brightness.
http://i81.photobucket.com/albums/j240/53willys/Dodge%20Stuff/DSC_0346.jpg
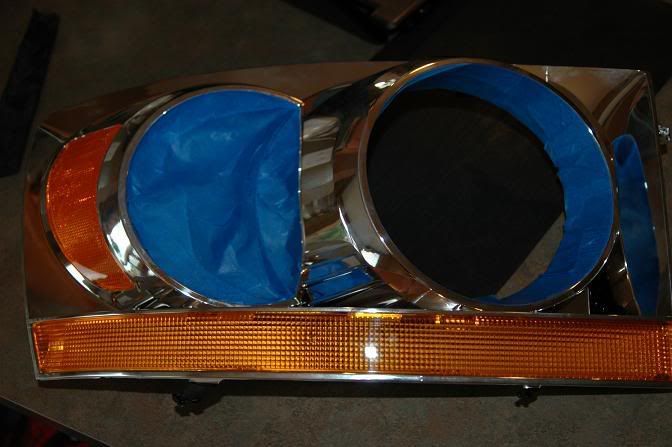
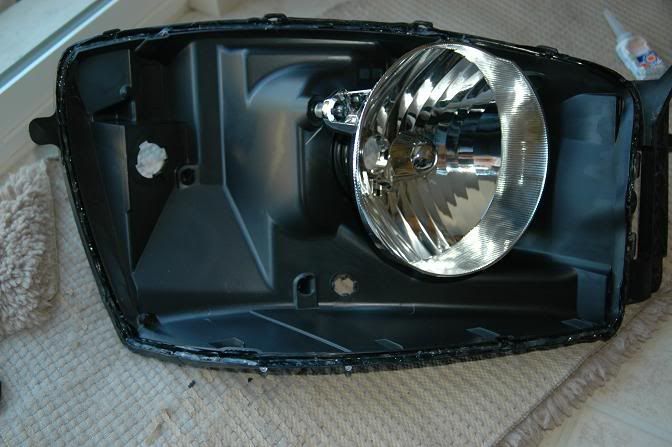
as you can see I left ALL my reflectors in and just painted over them...you could tint them or paint just the side reflector or neither...but I wanted the all black look so I painted all of them.
you could take the side reflector out but then it leaves a indentation and the lower amber strip has to be painted or tinted cause if you remove it it will leave a big gap/hole.
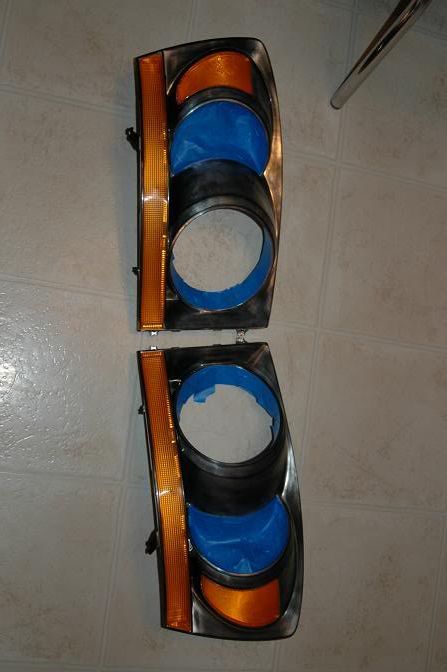
Here is a shot of both lights after being sanded with the scotch brite pad.
- NOTE* make sure you get ALL the chrome off the flat parts of the housing...if you don't when you spray the paint promoter it will cause the chrome to bleed and it looks like cracks...it not as bad in the corners and crevices. I would just get as much off as you can it comes off really easy too.
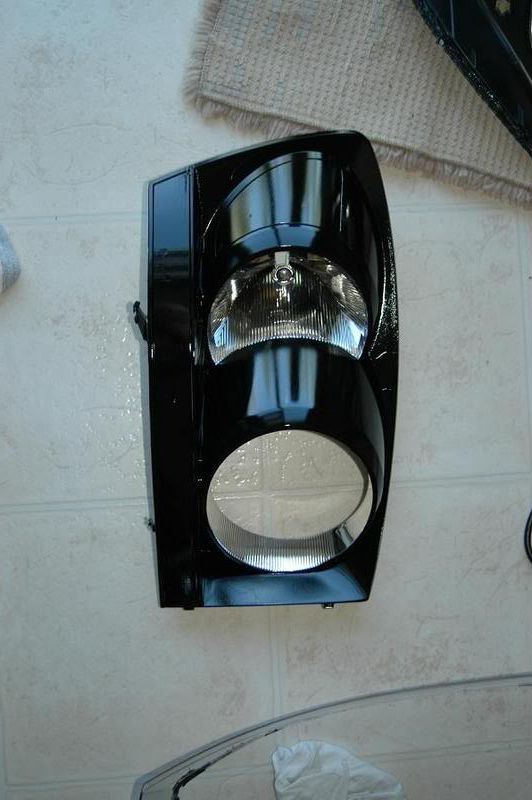
here they are taped, sanded and cleaned....ready for paint.
http://i81.photobucket.com/albums/j240/53willys/Dodge%20Stuff/DSC_0350.jpg
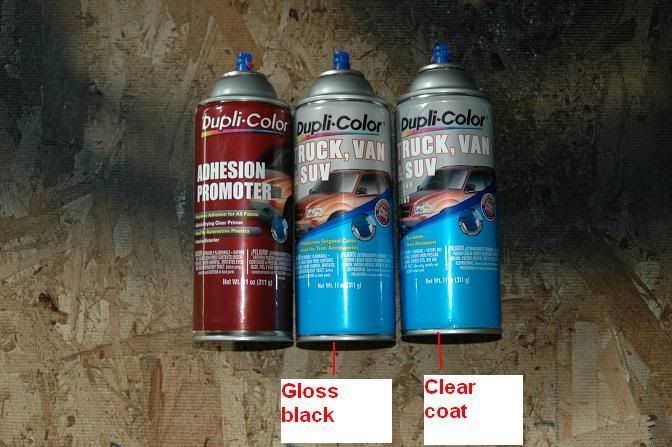
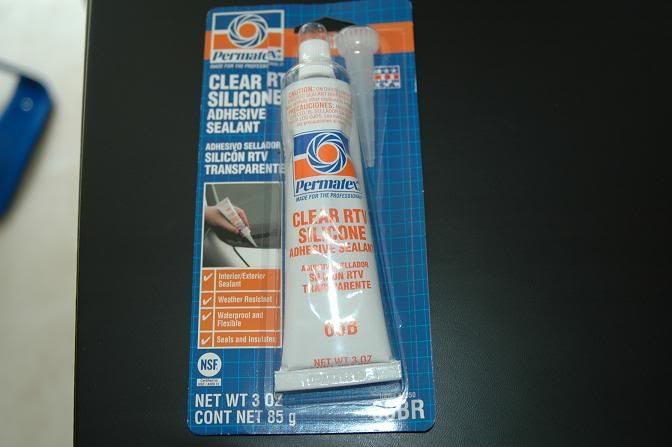
This is the paint I used, available at any parts store.
use the promoter first. just follow the instructions on the can.
then gloss black(or whatever color you like). just follow the can instructions.
Then the clear coat...follow the can instructions
once you start to paint you have to keep going otherwise you have to wait for it to cure..so plan your painting time accordingly other wise you will be up till 2:00 am painting like me or waiting for it to cure
http://i81.photobucket.com/albums/j240/53willys/Dodge%20Stuff/DSC_0367.jpg
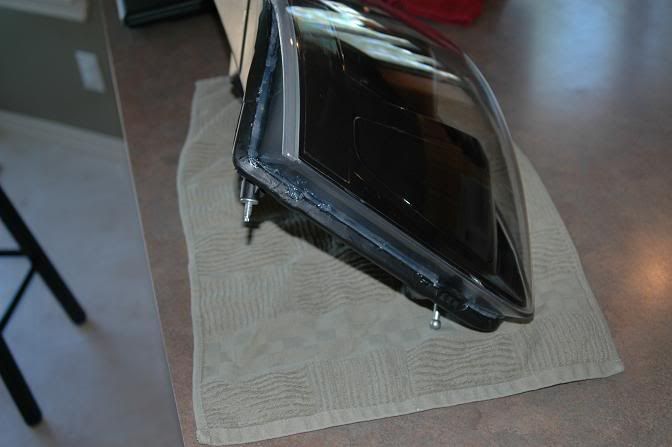
Now while the paint dries on the lights, it's time to fix all the bending and prying we did to the black housing...this takes a heat gun or hair dyer (I used a heat gun, I think a hair dyer would take a looooooong time)
http://i81.photobucket.com/albums/j240/53willys/Dodge%20Stuff/DSC_0336-1.jpg
you can see the black housing took a pretty good beating...but it can be fixed...just take the clear lens and start to mold it back onto the black back housing with the heat gun. try to pinch the edges of the black housing down flat against the clear lens, it actually goes together pretty fast.
looks like this when your done molding it.
http://i81.photobucket.com/albums/j240/53willys/Dodge%20Stuff/DSC_0357.jpg
http://i81.photobucket.com/albums/j240/53willys/Dodge%20Stuff/DSC_0358.jpg
Now PULL IT BACK APART!!!yep that's right.
Don't try and skip this step and go straight to siliconing..the lens wont fit right and you will have a big mess on your hands..
Now that the paint has dried. Make sure it is good and dry you don't want finger prints on the headlights. I let mine dry over night.
here is a shot of the inners all painted up
http://i81.photobucket.com/albums/j240/53willys/Dodge%20Stuff/DSC_0362.jpg
Now it's time to glue/silicone them back together.
before you do make sure you clean ALL the rug lint, dog hair and anything else out of the headlights..clean all the chrome and make sure you don't have finger prints all over the place...don't forget to clean the clear lens inside too
then take some silicone Clear or black and run a bead in the "valley" of the Black housing....don't over do it or you will have a nasty mess on your hands and silicone may push inside the light!!!
I used clear on my headlights but if I did it over again I would buy one pack of clear and one pack of black...then I would use clear to seal the "valley" and black as the final bead....
this is what I used comes in black or clear. you will need two tubes either way
http://i81.photobucket.com/albums/j240/53willys/Dodge%20Stuff/DSC_0351.jpg
here is a shot of the silicone in the black housing "valley"
http://i81.photobucket.com/albums/j240/53willys/Dodge%20Stuff/DSC_0363.jpg
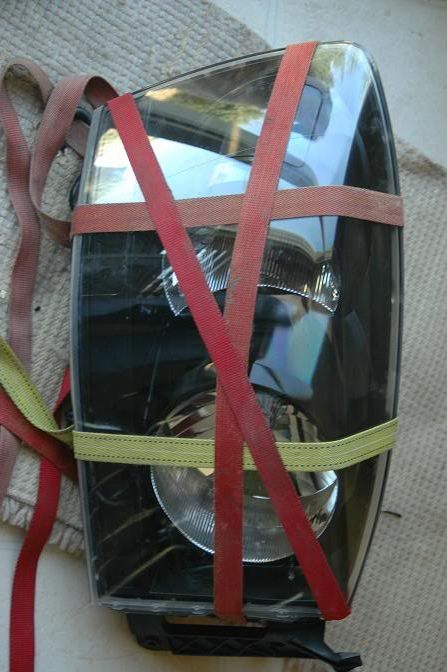
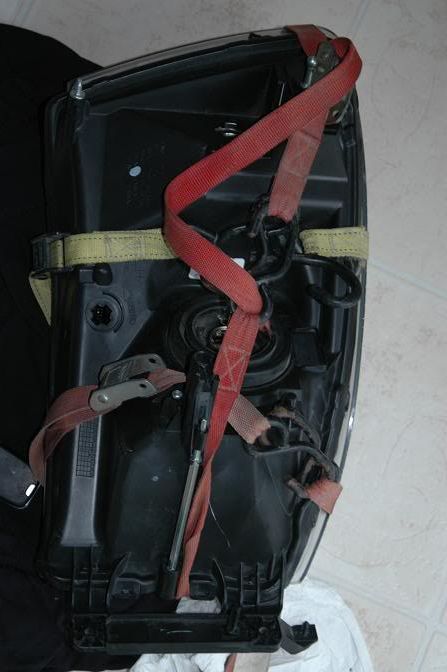
now it's time to press them together, I was told 10-15 mins of holding them together would work but I did not like that idea so this is what I did. left them like this for a few hours. Careful tho you don't want to break the lights!!! *note* my dog looking in the back window
http://i81.photobucket.com/albums/j240/53willys/Dodge%20Stuff/DSC_0364.jpg
http://i81.photobucket.com/albums/j240/53willys/Dodge%20Stuff/DSC_0360.jpg
Now that they have sat for a few hours, it is time to take the straps off and do one last bead of silicone around the Whole housing.
I used clear but would do black if I did it again as it may look a little cleaner..but it does not matter since you cant tell once they are on the truck.
http://i81.photobucket.com/albums/j240/53willys/Dodge%20Stuff/DSC_0388.jpg
http://i81.photobucket.com/albums/j240/53willys/Dodge%20Stuff/DSC_0366.jpg
http://i81.photobucket.com/albums/j240/53willys/Dodge%20Stuff/DSC_0365.jpg
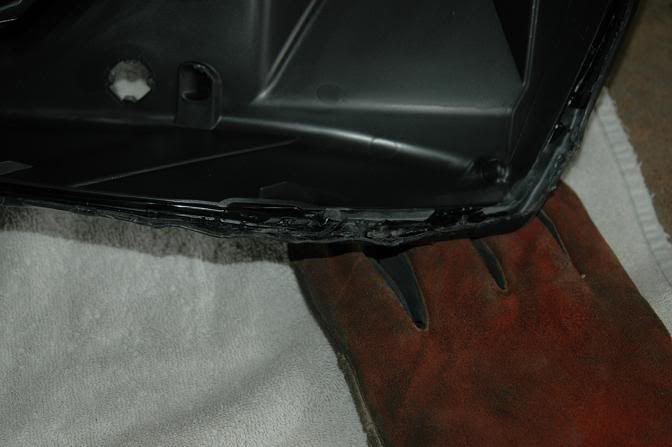
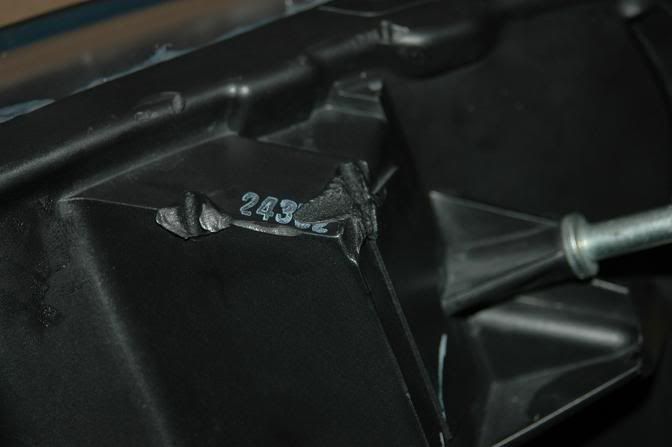
this is what happens when you get greedy with heating it in the oven!!!!
I was lucky again cause it did not burn through..be very careful
also some fogging of the headlights during the heating process is normal...
http://i81.photobucket.com/albums/j240/53willys/Dodge%20Stuff/DSC_0392.jpg
http://i81.photobucket.com/albums/j240/53willys/Dodge%20Stuff/DSC_0391.jpg
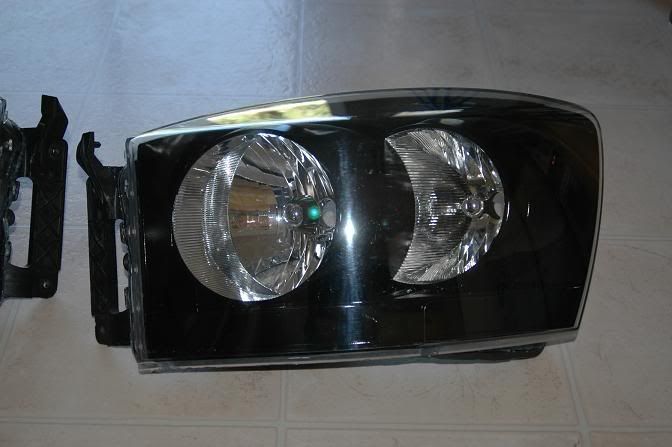
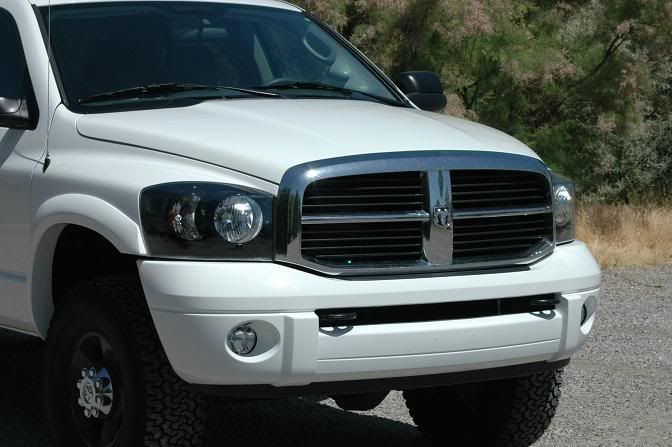
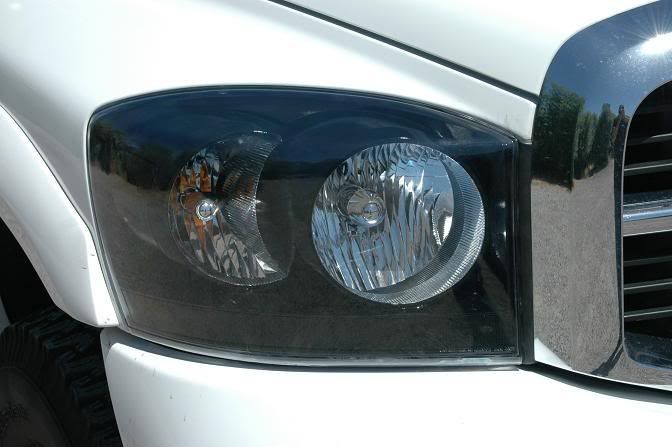
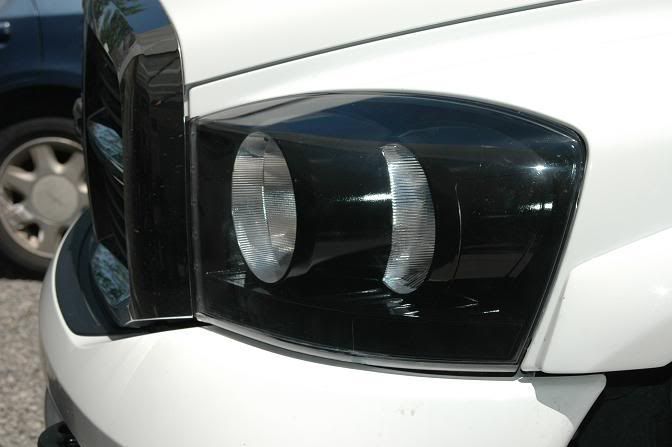
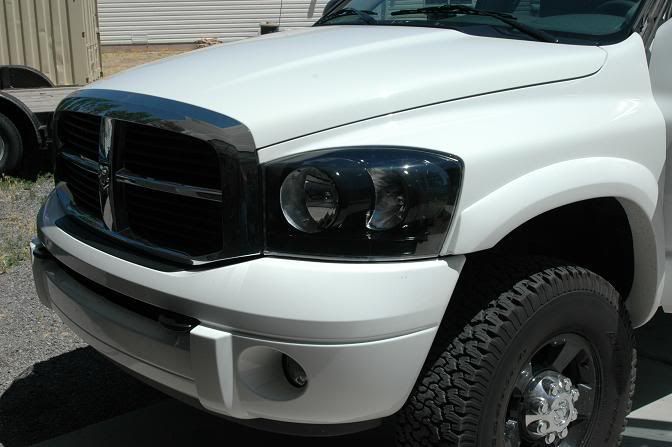
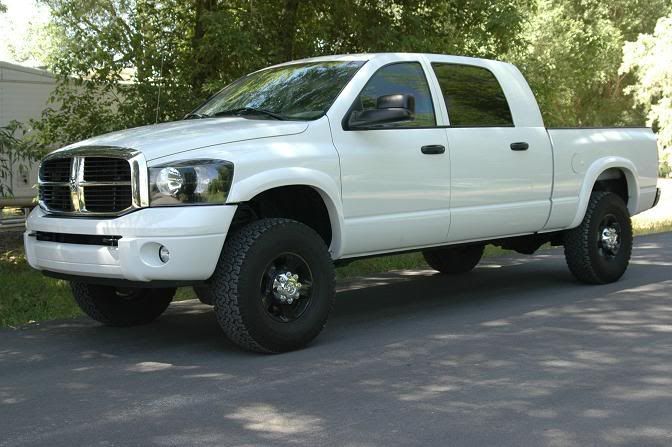
Now for the moment you have all been waiting for.......
Done pics
http://i81.photobucket.com/albums/j240/53willys/Dodge%20Stuff/DSC_0386.jpg
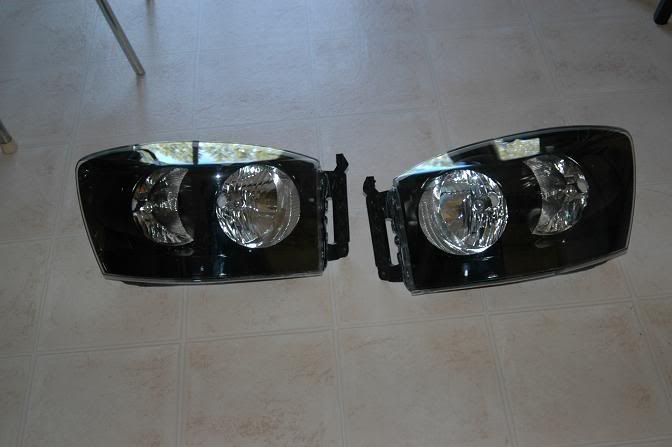
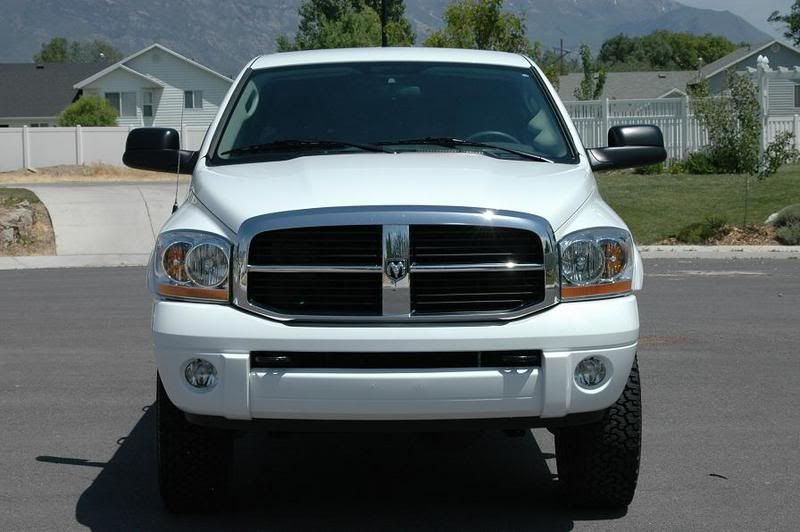
http://i81.photobucket.com/albums/j240/53willys/Dodge%20Stuff/DSC_0387.jpg
BEFORE
http://i81.photobucket.com/albums/j240/53willys/Dodge%20Stuff/DSC_0270.jpg
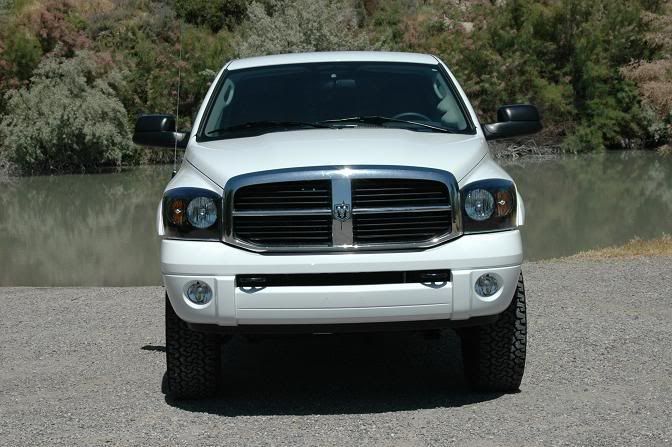
AFTER
http://i81.photobucket.com/albums/j240/53willys/Dodge%20Stuff/DSC_0393.jpg
http://i81.photobucket.com/albums/j240/53willys/Dodge%20Stuff/DSC_0394.jpg
http://i81.photobucket.com/albums/j240/53willys/Dodge%20Stuff/DSC_0395.jpg
http://i81.photobucket.com/albums/j240/53willys/Dodge%20Stuff/DSC_0403.jpg
http://i81.photobucket.com/albums/j240/53willys/Dodge%20Stuff/DSC_0401.jpg
http://i81.photobucket.com/albums/j240/53willys/Dodge%20Stuff/DSC_0398.jpg
Well...what do you think?????
WOW this write up made me tired... that was a lot of work!!!!!
almost as much as the headlight mod.
--Iker42 11:10, 11 July 2007 (EDT)