Drum To Disc
Rear Drum To Disc Brake Conversion
Original Write Up By BC847
I was recently talking with the wife about my wants as far as hopping up the heap. She never really looked away from the game she was playing during the conversation.
At one point she interupted mumbling "Can you make it stop?" Being sarcastic, I replied "Shoot! They make a rear disc conversion for it if ya want!"
She said "Fine!"
I said "Fine!"
This is NOT a "How-To" but more of an example of "What you're in for" thread.
There's substantial modifications and fabrication involved so if you have to ask instruction . . . . . lay down the wrench and step away from the truck.
Anyhoot, I'm working on the rear axle of a 1993 W250 CC with the typical Dodge OEM issue DANA70 axle with drum brakes.
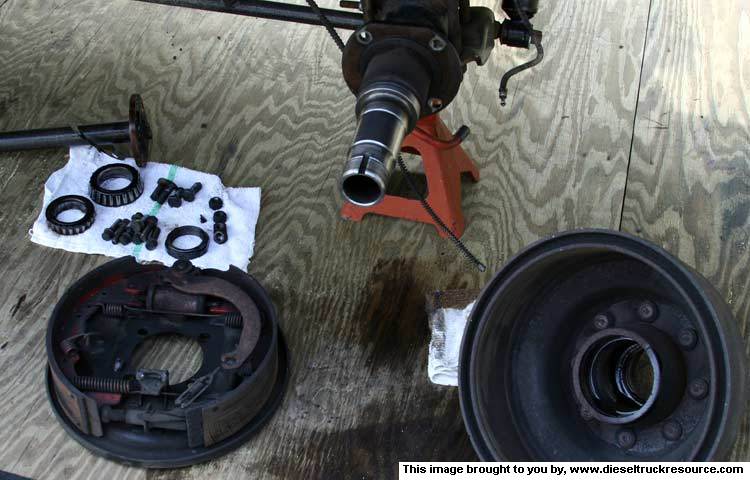
Of course, start by removing everything. I just took out the four back-plate bolts and removed the entire drum brake assembly.
http://www.dieseltruckresource.com/pics/data/544/RemoveOldRearBrakes.jpg
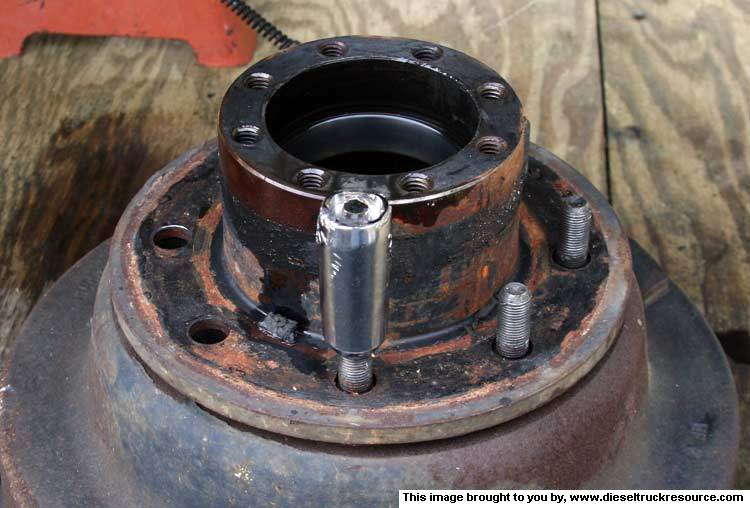
To replace the drum with a rotor, I had to remove the lugs without destroying them. I used one of the stupid Anti-Theft lug nuts to take the beating.
http://www.dieseltruckresource.com/pics/data/544/RemoveWheelStuds.jpg
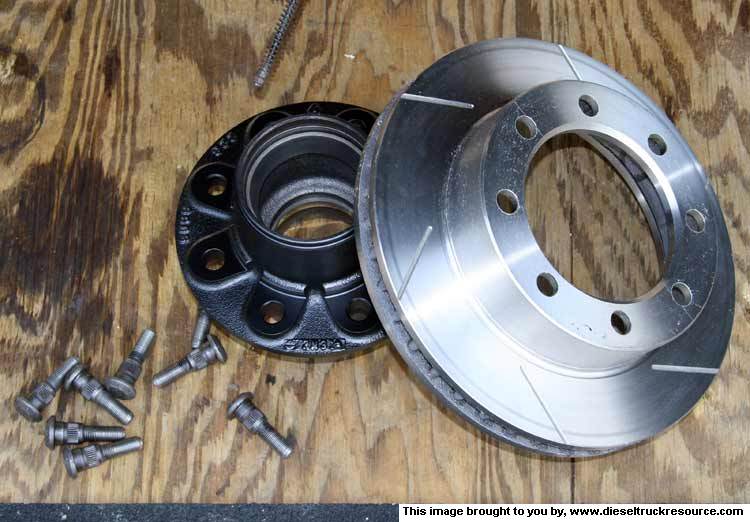
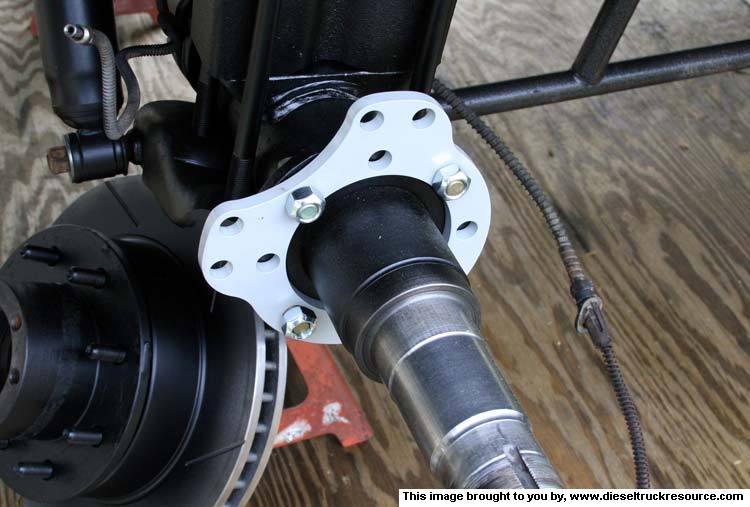
Here I've cleaned and painted the OEM axle bearing hub and am fixing to mount the rotor. It's from an '82 to '95 Ferd F250 diesel. As such it still has to have the hub hole enlarged to fit our mess. Further, the rotor's holes for the lug's heads must be enlarged to accomodate most of our trucks lugs. As part of the install, I had to mill the heads of my lug bolts to fit the rotor. Slotted/vented rotors are extra.
http://www.dieseltruckresource.com/pics/data/544/InstallRotor.jpg
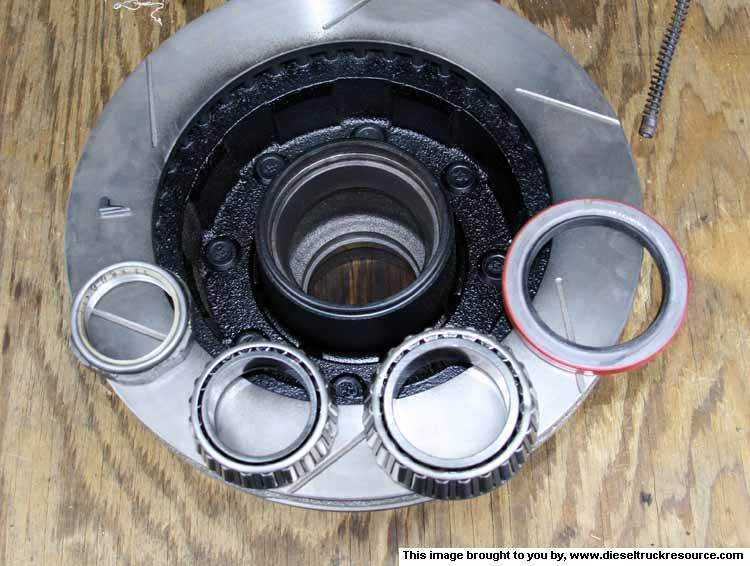
With cleaning/painting the assembly, new seals have the rotor/hub ready to install.
http://www.dieseltruckresource.com/pics/data/544/CleanBearingsAndNewSeal.jpg
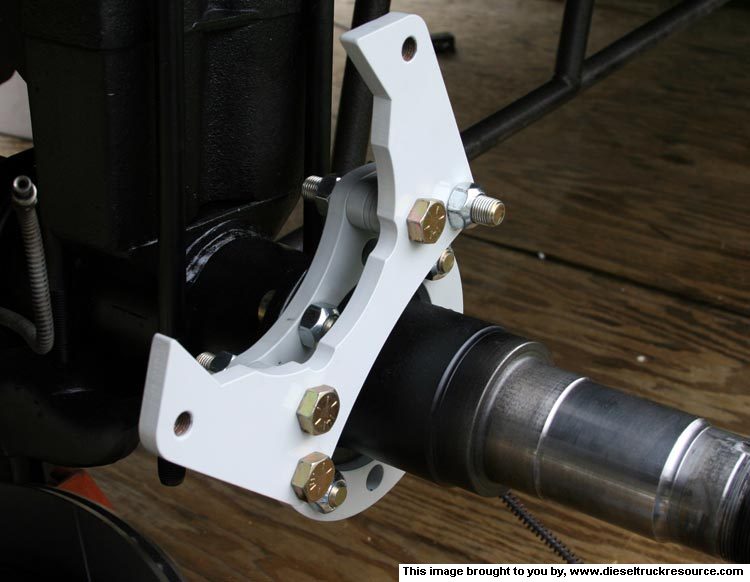
Now, after cleaning and painting the axle tube stuff, I first mounted the base bracket. This particular one allows one to mount the caliper in any number of positions to suit one's needs.
http://www.dieseltruckresource.com/pics/data/544/InstallBaseBracket.jpg
Then I installed the bracket that actually holds the caliper. Both brackets are of substantial plate-iron with a very fine cut and powder finish. High quality fasteners hold it all together.
http://www.dieseltruckresource.com/pics/data/544/InstallCaliperBraket.jpg
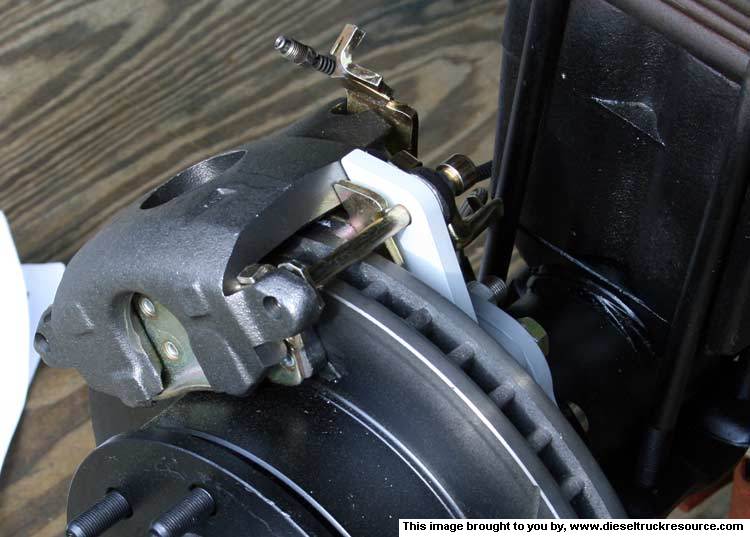
Mounting the caliper is pretty-much straight forward. Apparently one can get basic calipers to work but I wanted the parking brake feature. I ended up with '76 to '77 Cadillac Eldorado calipers. I wanted all the associated cables and hoses to end up mounted high so as to be out of harms way. As such, these calipers are installed with the bleed ports on the bottom of the piston cylinder. I have to remove the caliper assemblies to bleed them properly. No big deal.
This design caliper requires a slot to be in the piston so as to key with a bump on the included pads. It keeps the piston from rotating in it's bore. If you mess with this kind, be sure to key the pads to the piston when installing.
http://www.dieseltruckresource.com/pics/data/544/MountCaliper.jpg
Well, that was the easy stuff.
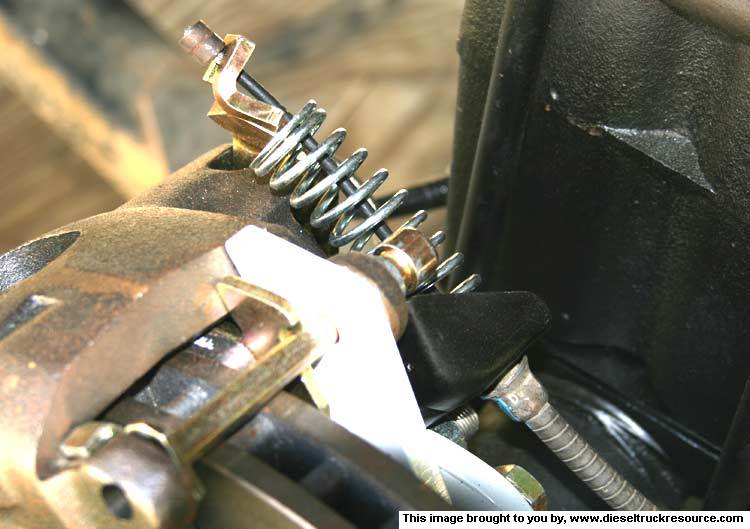
Naturally, the OEM bracket that came with the Eldorado caliper does not mate with the Dodge drum parking brake cable. Further, the current bracket puts the PB cable in the head of an adjacent bolt.
A trip to the local auto junk yard found a later model Eldorado bracket that moved the cable away for a better fit. I still had to modify it to fit this caliper though.
Then there's the thing about the Dodge PB cable sleeve's end. The one that plugs in the drum backing plate sideways. I ended up getting the PB cables off that same Eldorado.
With some aluminum duct-tape, bailing wire, and two 1/2" x 4" black iron nipples, I made PB cable sleeves that would fit a Dodge at one end, and a Cadillac at the other. Compare the end shown in the first image of this post, to that shown in this image. Works like a champ.
http://www.dieseltruckresource.com/pics/data/544/BetterPBCableBracket.jpg
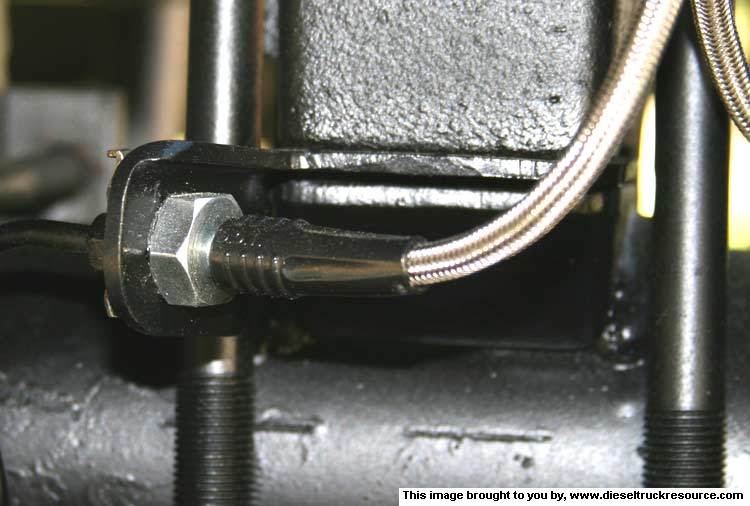
Because the caliper moves on it's mount, the associated hydraulic fluid lines must be such as to accommodate that movement. I used stainless steel braided lines for their firmness over the typical reinforced rubber type. Either way, one needs to come up with a firm mount for the flexible line's connection to the trucks ridged tubing. Using some 10 gauge C-angle, I cut and bent a bracket that is mounted by sandwiching it between the axle's spring mount, and the associated OEM lift block. It allowed me to place the connector and tubing, so that the caliper could still be removed for bleeding, without having to disconnect the flexible line.
http://www.dieseltruckresource.com/pics/data/544/BrakeHoseConnectorMount.jpg
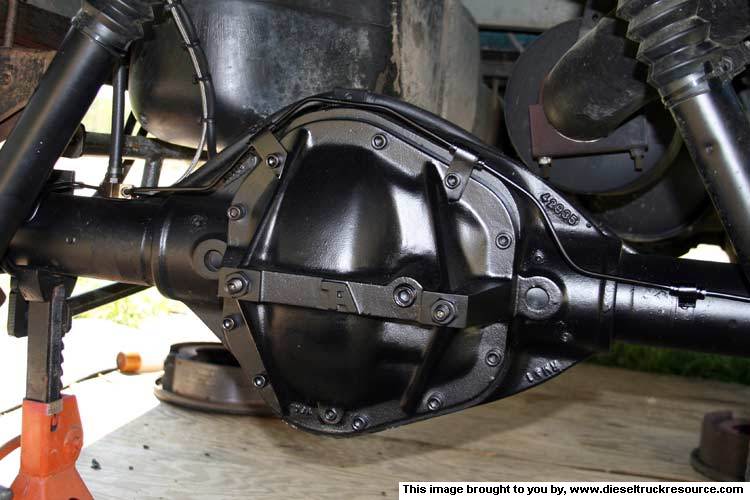
Because the OEM drum brakes had the OEM hydraulic tubing connect directly to the OEM backing-plate, the OEM tubing was too long to connect to the flexible sections without having to wad up the tube(s). I replaced them with shorter lines so as to fit nice and purdy. I added extra mounts over the differential so as to keep the lines very secure. The OEM lines are wrapped in wire so as to provide protection. The extra mounts will help there but I also insulated the steel tubing from the mounts with some reinforced fuel hose. Works nice.
http://www.dieseltruckresource.com/pics/data/544/NewSteelLines.jpg
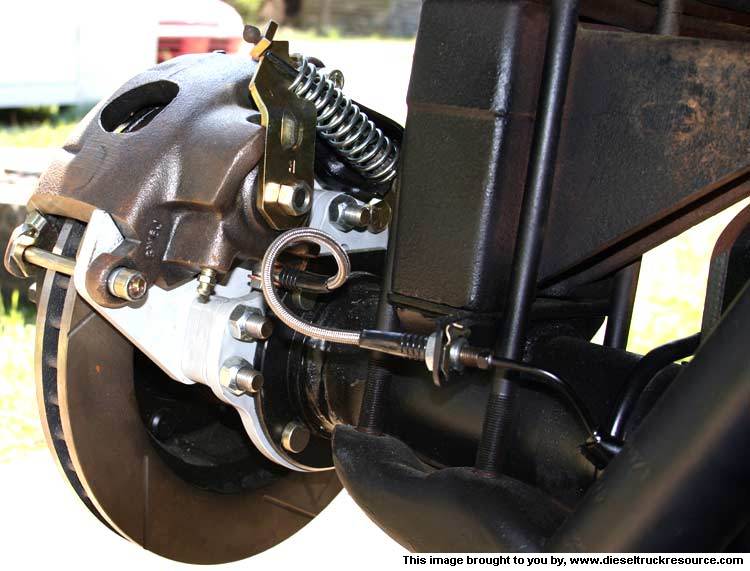
After replacing the master cylinder and front calipers with re-manufactured units, turning the front rotors, replacing all the brake system's flexible hydraulic line sections with stainless braided, flushing the circuit with synthetic DOT4 fluid, I can open my mouth and have spit hit the windshield with no more than two inches of pedal travel. A panic application has the rear wheels lock first with the ABS feature pulsing as it should.
The parking brake pedal locks the wheels in six clicks.
One of the first things I noticed was the truck doesn't nose-dive near as bad as before. Very sure-footed braking.
http://www.dieseltruckresource.com/pics/data/544/RearDiscComplete.jpg
I like it.
I hope this helps those who're considering such an upgrade. Do your homework. Measure three times and cut once.
Thanks again to Dave (wannadiesel) for hosting my images.
--Iker42 10:35, 10 July 2007 (EDT)