Dana/Spicer Universal Joint
Folks, this is another attempt to repay you for all that I've learned here.
This is by no means "The Authoritative How-To" regarding replacing the front universal joints. These instructions are based solely on my experience with my heap exclusively using the best means I had at the moment.
In this job, I'm gonna replace the front axle universal joints.
NOTE: Keep in mind I'm working on the stock, OEM style front axle as installed by Dodge on a 1993 W250 4x4 ClubCab at 226K miles. Specifically the DANA/Spicer 60 4500# axle with OEM manual locking hubs. Another trucks mileage may vary.
Finally, I'm gonna pretty-much fast forward through the truck set-up & disassembly and concentrate on the universal joint replacement.
READ ALL THESE INSTRUCTIONS BEFORE ATTEMPTING THIS WORK.
With that, let's get started.
As always ~ SAFETY FIRST!
- Chock the rear wheels
- Set the emergency/parking brake.
- Disconnect the Negative battery cable from the battery.
- Have a known good fire extinguisher within sight.
- Have a clean, uncluttered work area.
- Have good lighting.
- Considering you'll be lifting/holding the vehicle with a jack and safety stands, be sure they're rated for the load with a good safety factor. Don't cut any corners here. Cinder-blocks WILL kill you! When considering all this, don't forget to include a strong, level area to park the truck.
- With any work I do, I usually power wash everything the night before. If you don't have the means at home, the local car-wash works well. If you don't walk away soaking wet with gritty/grime on your face, you need to strike it again.
- All right. Set the parking/emergency brake and chock the rear wheels. Go ahead and loosen the front wheel lug nuts while the truck is still on the ground.
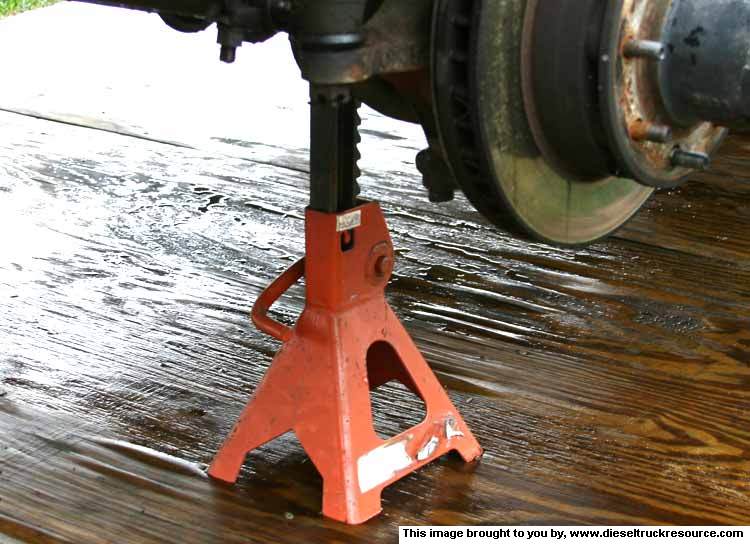
- Safely raise and firmly support the front of the truck. I found about an inch clearance under the front tires worked well. It certainly made putting the tires back on much easier.
I used a 3-ton capacity safety stand set so that the hand of the stand supported the axle where the axle tube meets the knuckle assembly ~
http://www.dieseltruckresource.com/pics/data/544/SafetyStand.jpg
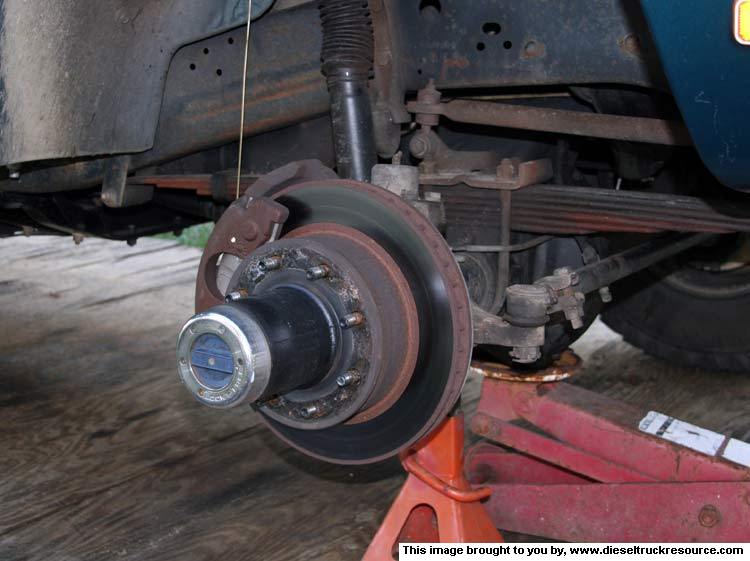
Now go ahead and remove the tire ~
http://www.dieseltruckresource.com/pics/data/544/TearDown.jpg
Again, fast forwarding through the tear-down;
- Remove the brake caliper assembly and brake pads.
- Hang the caliper with a length of coat-hanger wire from a hole in the fender-well. This will help ensure you don't screw-up a brake fluid hose.
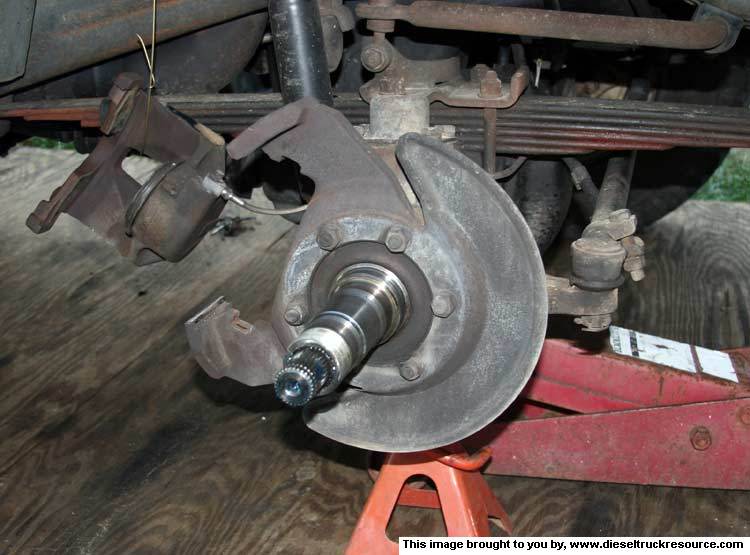
- Remove the brake rotor/hub assembly and wipe the spindle dry.
This thread should prove informative for doing so. Click Here
http://www.dieseltruckresource.com/pics/data/544/RemoveBrakesHub.jpg
- Now remove the six (6) nuts and washers that secure the brake rotor shield and caliper mounting bracket. You may have to tap the bracket with a brass headed maul to loosen it. ~
http://www.dieseltruckresource.com/pics/data/544/RemoveShieldBracket.jpg
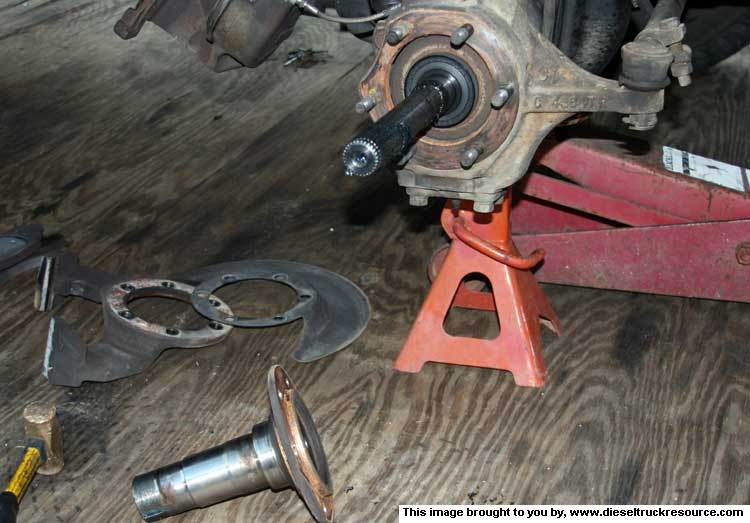
- Now remove the spindle. Again, you may have to tap it with a brass headed maul to initially loosen it. NOTE: The axle may very well tend to come out with the spindle. I thought it best to leave it in place so as to not screw up a seal. I simply pushed the end of the axle shaft into the spindle as I removed the spindle. ~
http://www.dieseltruckresource.com/pics/data/544/RemoveSpindle.jpg
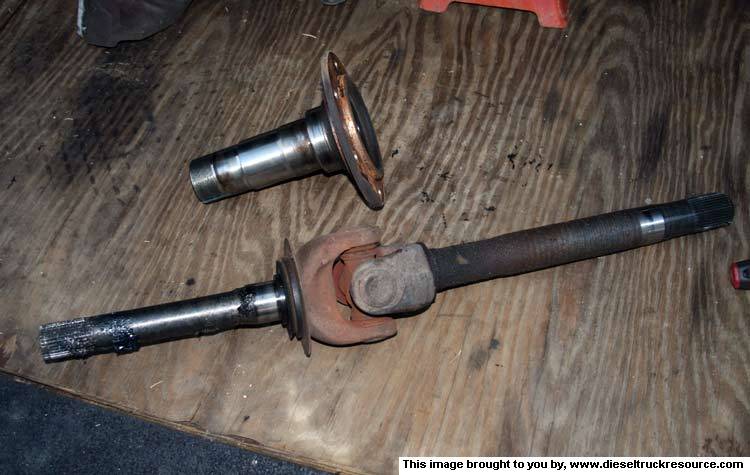
- Finally, pull the axle from the axle-tube. The driver's side axle shaft is much longer than the passenger side so be ready to help it out. ~
http://www.dieseltruckresource.com/pics/data/544/ReadyToRebuild.jpg
- In the above image, on the left side of the shaft, up against the universal joint as shown, there's a small rubber seal and bushing (greasy). Remove those and set aside.
OK.
- So as to ensure we put things back together as we found them, let's make some match marks on the halves of the shaft assembly. ~
http://www.dieseltruckresource.com/pics/data/544/MatchMarks.jpg
- To begin the replacement of the old universal joints, we need to remove the C-clips that secure the bearing caps of the universal joint's spider. I used a flat blade screwdriver to pry the old clips out. ~
http://www.dieseltruckresource.com/pics/data/544/Cclip.jpg
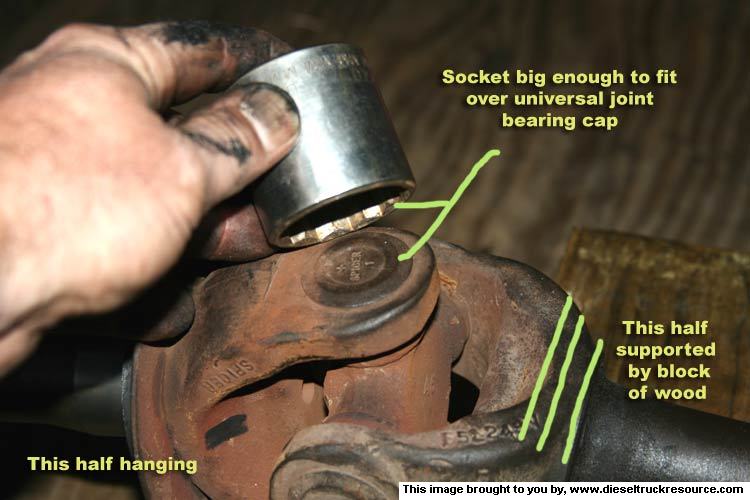
- We'll need to support one side of the shaft. I used a block of 6"x6" wood for this. Have the block of wood up against the spider, but not under it.
- I used a socket that's big enough to just completely surround the bearing cap without touching the cap. ~
http://www.dieseltruckresource.com/pics/data/544/BearingCapSocket.jpg
- I used my heavy brass headed maul, and striking the socket, drifted the bearing cap up, and out of the shaft yolk. ~
http://www.dieseltruckresource.com/pics/data/544/DriveCapOut.jpg
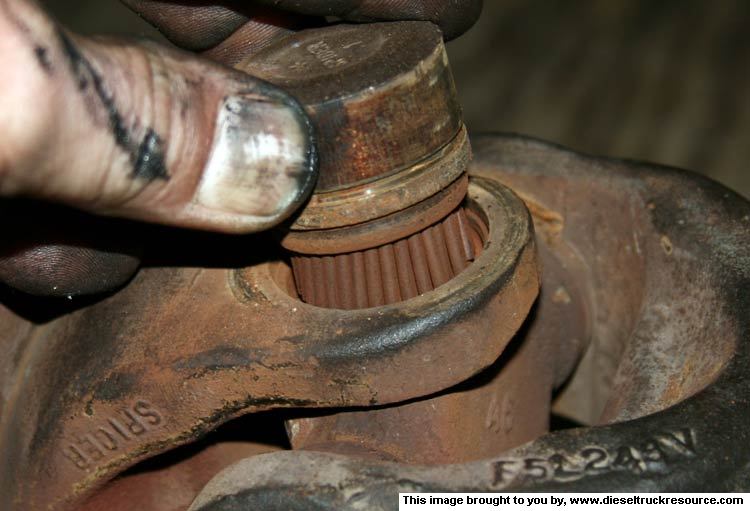
- Remove the cap. You can see mine were about done. ~
http://www.dieseltruckresource.com/pics/data/544/RustyBearingNeedles.jpg
- Flip the assembly over to remove the opposite bearing cap in the same manner.
- Remove the now loose spider from the now loose axle yolk. You'll have to c0ck it sideways to get it out.
- Using a second block of wood, support the two free ends of the universal joint spider.
- Drift the bearing caps out of the second halve of the shaft assembly.
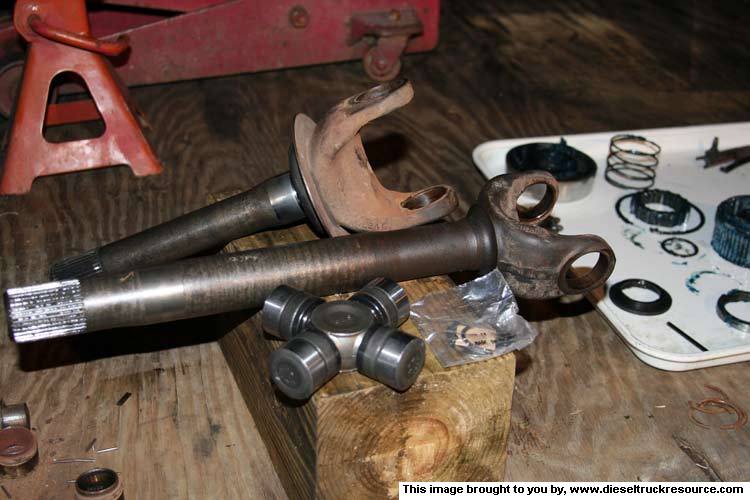
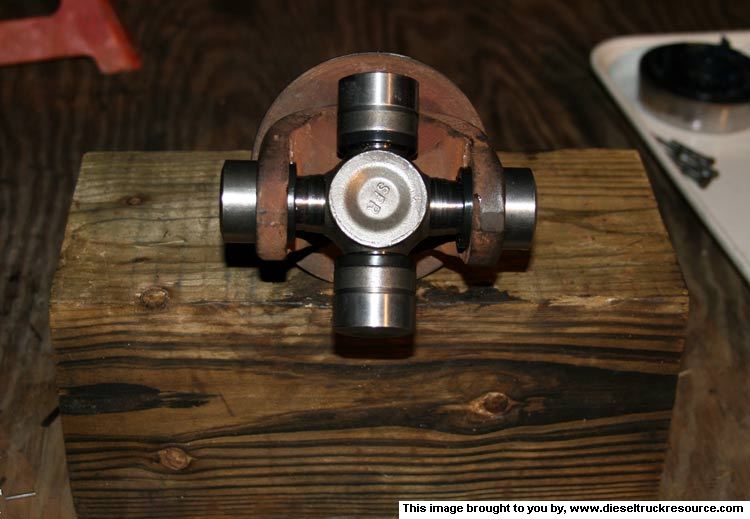
- Wipe the shaft surfaces and bearing cap bores clean.
http://www.dieseltruckresource.com/pics/data/544/ReadyToReassemble1.jpg
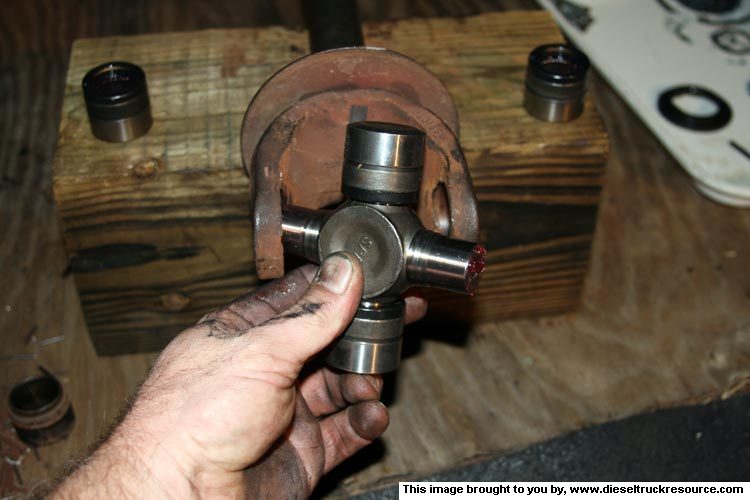
The old universal joint spider bearings were whooped. These are the stock/OEM non-greaseable type at 226 thousand miles. ~
http://www.dieseltruckresource.com/pics/data/544/OldBearings.jpg
Here's where we start putting things back together. <img src="http://www.dieseltruckresource.com/dev/images/smilies/cool.gif" alt="" title="Cool" class="inlineimg" border="0">
There are a few options for the DANA/Spicer wheel joints:
Forged with zerk ~ p/n SPL55-4X
Forged w/o zerk ~ p/n 5-806X
Old school cast ~ p/n 5-332X
- Remove two opposing caps from the new spider. Be careful not to get any trash in there. Don't add more grease if you're using non-greaseable spiders. Just like you removed the old spider, you'll need to c0ck the spider sideways to get it into the axle yolk.
http://www.dieseltruckresource.com/pics/data/544/NewJointStart.jpg
- Start the new bearing caps into the yolk bores. Be sure to keep things clean. Be sure that none of the needle bearings fall out of place. I slid the new spider back and forth in the caps to help initially align things. ~
http://www.dieseltruckresource.com/pics/data/544/InstallBearingCaps.jpg