3rd Gen Rear Breaks
This article is meant to give you some insight into what to expect if you want to attempt a DIY rear brake job on an early 3rd gen dually. It is not the definitive "How-to" but it's what I did.
I found myself in need of pads and needed my rotors turned. Because the bleeders snapped off I also ended up replacing the calipers. I tried to locate a service manual or the large, bound Chilton manual but came up empty locally. Once I started into this, as an after-thought, I decided to snap a few pictures and try to help the next guy. Those of you with slow internet connections are not going to be happy. These are 7 meg pictures and may load slow, sorry.The reason for the large file size is the detail they produce. If you need a larger pic, go to my gallery and view it. Some of my pics were taken out of sequence so I'll try to fill in as many gaps as I can. My local dealer quoted me $350 plus parts and machining for a rear brake job. In my opinion, they'd earn their money but I didn't have the extra scratch so it's onto the stands in the driveway.
I don't think I'd recommend this project for a beginner. IMHO you should possess a little more than basic knowledge and hopefully would have at least seen this done on another vehicle before attempting it yourself......alone......without help.(yea right, who am I kidding).
OK, since you're going to try it anyway, let's at least talk about being safe before we work. On this project you'll want to start out on a solid work surface like concrete or asphalt. If you're going to be working on asphalt, you'll want something under your jack stands to keep them from sinking. Make sure your jack stands are rated for the weight you're working with and also remember jack stands are typically weight rated in pairs. They also don't work well when they're un-level, sinking, tilted or in any other position other than placed on their bottom on a flat, level, solid surface. I know my truck weighs 8500 lbs. What does your truck weigh?
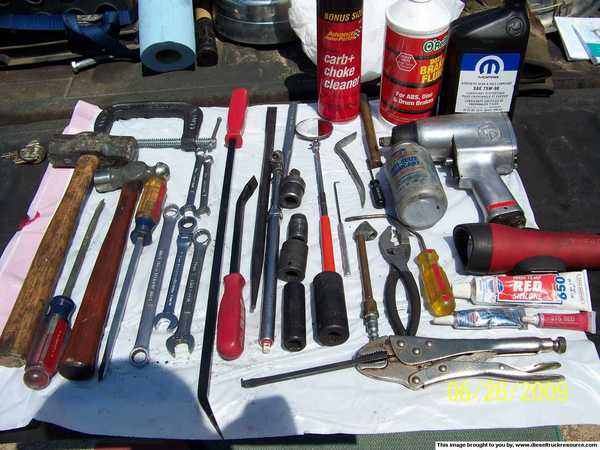
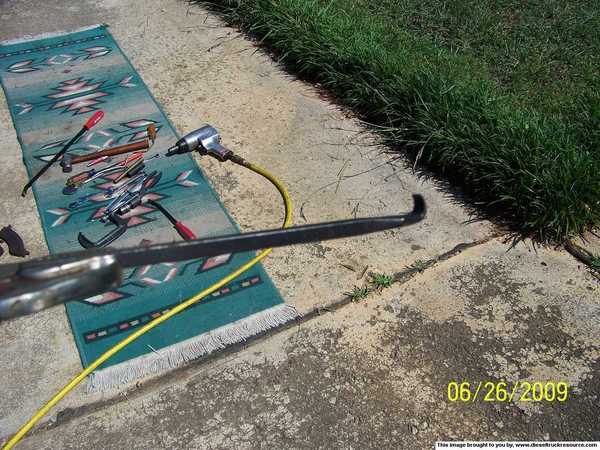
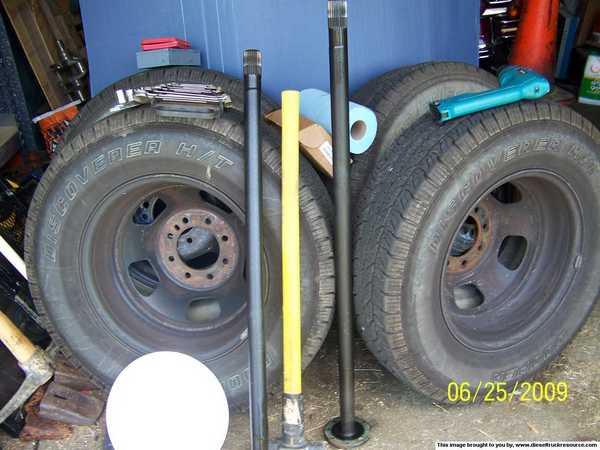
A little about what you'll need in the line of tools and supplies. Little more than basic hand tools will be all you need but a 1/2" impact is really necessary. There are allot of bolts and some are going to be tough. Here's a picture of the bulk of what I used. You will notice a couple of "not off the shelf" items. We'll get to those a little later. I'd make sure I had at least one can of brake cleaner or carb and choke cleaner.
http://www.dieseltruckresource.com/pics/data/500/medium/Rear_brakes_04_5_Dodge_3500_073.jpg
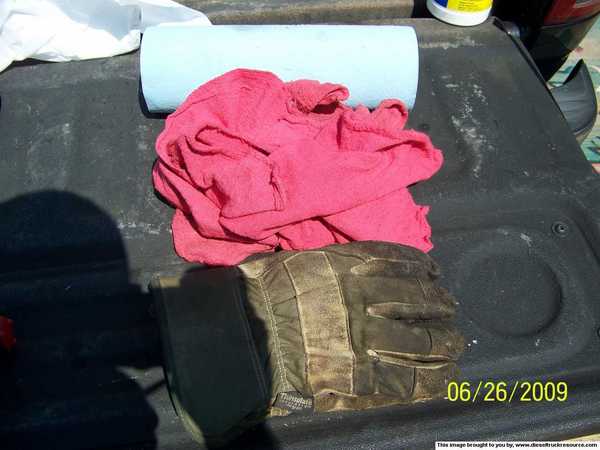
You'll also need an abundant (way more than you see here) supply of shop towels and rags. A pair of gloves is recommended.
http://www.dieseltruckresource.com/pics/data/500/medium/Rear_brakes_04_5_Dodge_3500_075.jpg
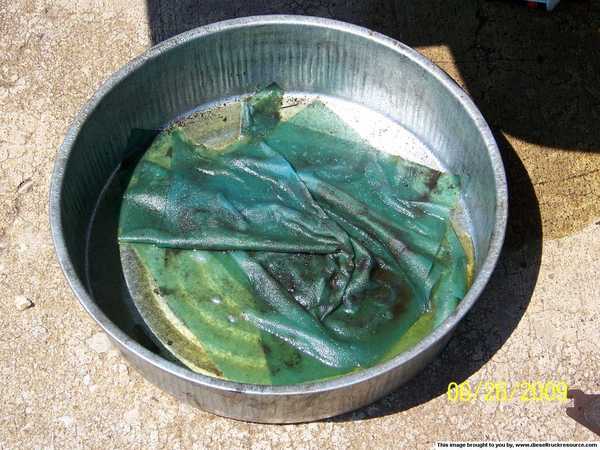
You'll also need a pan, two would be better, to catch the stray fluids you will encounter.
http://www.dieseltruckresource.com/pics/data/500/medium/Rear_brakes_04_5_Dodge_3500_076.jpg
Back to safety, remember to chock your front wheels. Since you're going to be jacking the rear off the ground, it matters. You set your parking brake right? Stick shifts are in low or reverse and auto's are in park. Cool, let's make a mess!
http://www.dieseltruckresource.com/pics/data/500/medium/Rear_brakes_04_5_Dodge_3500_078.jpg
You'll need to get your truck up in the air. A couple inches is enough and lower is usually more stable. I used a bottle jack because that's what I had. If you're doing it like me, jack one side and then the other. Notice the position of the jack stands. They're toward the outside of the axle and the axle is seated in the cup at the top of the stand. Both of these positions are important because they increase the stability of the truck while you are working under it.......without the wheels.
http://www.dieseltruckresource.com/pics/data/500/medium/Rear_brakes_04_5_Dodge_3500_077.jpg
After you have the truck on the stands, climb out from under it and give it a good shake. If it wiggles around, moves back and forth or just doesn't feel stable, call a reputable towing service to put it back on the ground and get your check book out. You my friend are going to the dealer.OK, everybody knows how to set the stands, this is just old man humor.
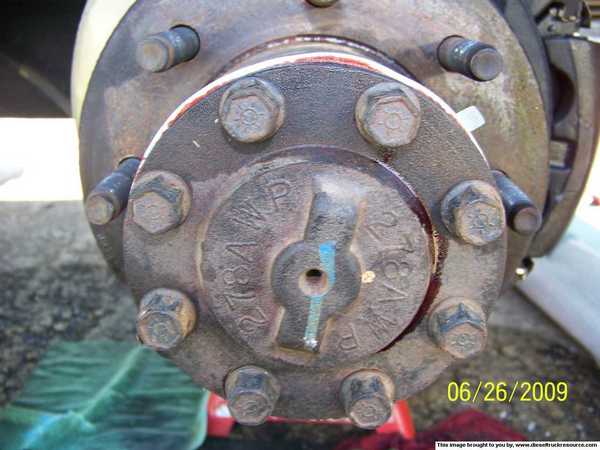
Now for the first of the "not off the shelf" tools. This is nothing more than an old screwdriver blade with the handle removed and the tip heated and bent 90*. I use it to remove the center caps. Clamp it tightly in a pair of vice grips.
http://www.dieseltruckresource.com/pics/data/500/medium/Rear_brakes_04_5_Dodge_3500_071.jpg
There is a notch in the center cap.
http://www.dieseltruckresource.com/pics/data/500/medium/Rear_brakes_04_5_Dodge_3500_079.jpg
Feel around until you find it and slip the tip of the blade into it and jerk hard, straight out. This would be a good time to mention that you may fall on your backside when the cap pops loose so take note of what's behind you and who's looking.
http://www.dieseltruckresource.com/pics/data/500/medium/Rear_brakes_04_5_Dodge_3500_080.jpg
Next, using a wide screwdriver or a hubcap removal tool, carefully pry your beauty rings or simulators off. Once you've done that, grab your air wrench, a deep well socket and your PPE and get those lug nuts off. Be careful when you go to start pulling the wheels off. Like most things on our trucks they're heavy and dually wheels are prone to be a little lop-sided. The outer wheel should come off fairly easy but the inner can stick. If it does, the culprit is most likely the center hole but sometimes they rust onto the face of the hub. This happens allot when the truck has lived in an area where you see allot of rain, salty conditions like on the coasts or where there is allot of snow and chemicals are used to melt it off the highways. If you have this problem, the wheel can usually be removed with a few well placed strikes on the back of the rim with a sledge. You will have to alternate side to side every couple of swings. At this point we're going to assume that everything is cooperating and move on.
Next, you'll want to release the parking brake. You don't have to worry, you chocked the wheels...........remember. On the outside of the driver's side frame rail locate the parking brake cable adjuster and back it off a few turns. You don't need to unhook anything, just put a little slack in the cable.
http://www.dieseltruckresource.com/pics/data/500/medium/Rear_brakes_04_5_Dodge_3500_084.jpg
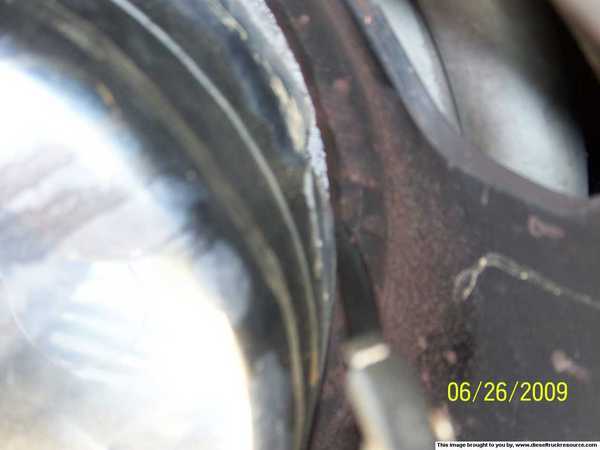
Now we're going to have a little fun. Crawl under the truck from the back. On the passenger's side, on the back of the backing plate, in the center near the very bottom but above the little shield there is a recessed area that is oval or oblong shaped. Inside of that there is a rubber plug. It looks like the type of plug you would see on a vehicle with drum brakes.
http://www.dieseltruckresource.com/pics/data/500/medium/Rear_brakes_04_5_Dodge_3500_086.jpg
There's a good reason for that. You have drum brakes as well as disc brakes. The disc brakes are your primary or service brakes and the drum brakes are your emergency or parking brakes. Some of you may have adjusted your cable in the past trying to get your parking brake to hold better. Thats OK for a while but when it won't adjust any further you have to adjust your brakes here.
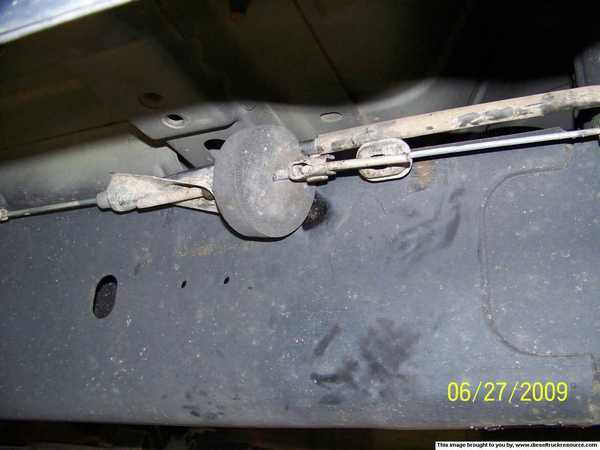
Go ahead and pry that little cap out and look in the hole with a good light. You'll see a star wheel but it's a little different. You can use a regular brake spoon to tighten or loosen this adjuster but just leave it alone for now, the real challenge is next door. What you are about to discover is that in order to reduce manufacturing costs and parts inventory, Dodge, like other manufacturers, use the same part but just turns it over to make lefts out of rights and rights out of lefts. The backing plate you just looked at has a twin and it's on the other side of the truck.............but it's upside down. That means the easily accessible, easy to adjust adjuster just turned into a booger bear pooch. You've now got around 4 inches or so of space to get some light, a mirror, a tool and you into. (Did I mention it's on top now?) Here's a pic of the general area. Starting at the top of the housing run your fingers up the backing plate. You'll feel another oval shaped hole with a rubber plug set deep into the backing plate. Go ahead and set up your light, grab your mirror and get the plug out.
http://www.dieseltruckresource.com/pics/data/500/medium/Rear_brakes_04_5_Dodge_3500_053.jpg
And here is a pic of the adjuster with the rubber plug removed. The star wheel is to the left.
http://www.dieseltruckresource.com/pics/data/500/medium/Rear_brakes_04_5_Dodge_3500_057.jpg
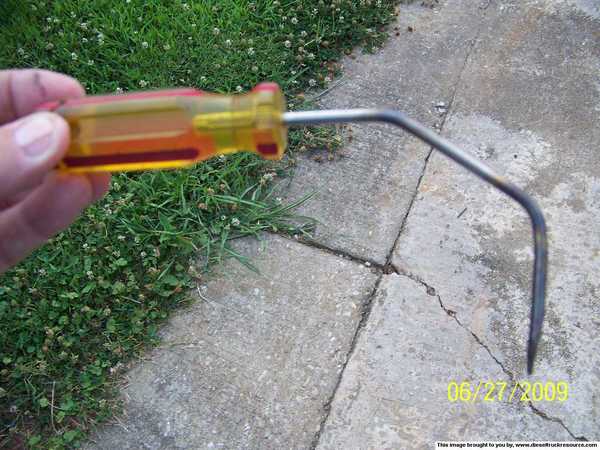
Here's the other custom tool I needed to work this adjuster. I had to tweak the final bend to get it to work.
http://www.dieseltruckresource.com/pics/data/500/medium/Rear_brakes_04_5_Dodge_3500_087.jpg
The reason I had you start on the driver's side is because it's truly the toughest. If you can get the parking brake adjuster backed off you've got the hard part done. Once you finish backing it all the way off you can move on to the axle.
To pull the axle you need your impact gun again, a regular socket and your PPE. Here's what you're looking at.
http://www.dieseltruckresource.com/pics/data/500/medium/Rear_brakes_04_5_Dodge_3500_065.jpg
Go ahead and start taking out bolts but leave the last two. These bolts have a chemical thread locker on them and they can be a little tough to remove. Make sure you keep your socket pushed down all the way on the heads while you are removing them. You don't want to round one of these off.
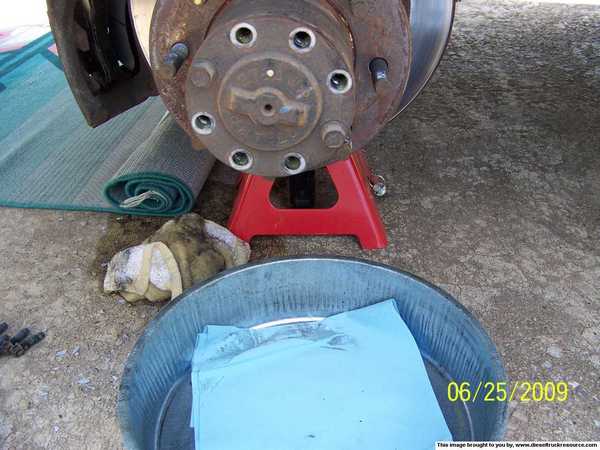
Now would be a good time to put that pan you have under the axle.
http://www.dieseltruckresource.com/pics/data/500/medium/Rear_brakes_04_5_Dodge_3500_002.jpg
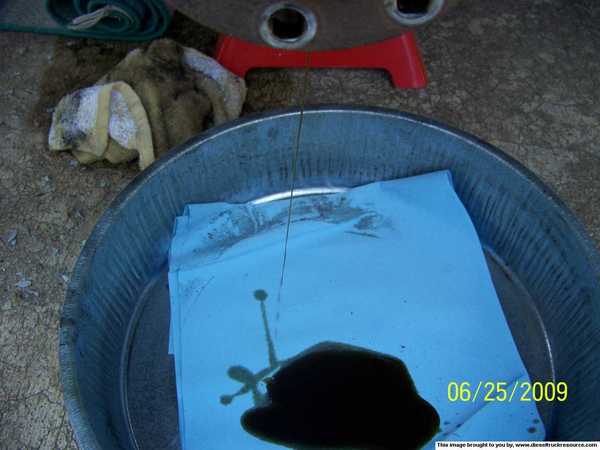
Good, the pan's ready, take out the last two bolts. Once you take out all the bolts, give the axle a light tap on the end cap with a hammer to break it lose. Usually they pop right lose on the first tap but it may take a bit more. Remember to hit in the middle of the end cap and toward the truck. DO NOT hit sideways on the cap. Once the cap breaks loose you'll get a little fluid running out of the tube. Oh crap, you broke it!!! No, just kidding, it's suppose to look this way.
http://www.dieseltruckresource.com/pics/data/500/medium/Rear_brakes_04_5_Dodge_3500_003.jpg
Carefully slide the axle straight out of the tube and place it somewhere out of the way. Stand it up and keep it clean. Take a little care now to save some aggravation later.
http://www.dieseltruckresource.com/pics/data/500/medium/Rear_brakes_04_5_Dodge_3500_004.jpg
Some of you may like to remove the brakes before pulling the axles, that's fine. It really doesn't matter. I was just using the time to let the dripping stop. If you were just going to hang another set of pads you wouldn't pull the axles. I'm going to be removing the rotors to have them turned so the axles have to come out. Initially, I was hoping just to hang pads so I took the calipers out of the mounting brackets. If you're going to do this, let's look at a little hose saver you can make really quick and on the cheap.
The last thing you want to do is leave that heavy caliper hang on the little flexible line that's connected to it. That's where these come in handy. All I did was bend two welding rods and like Dodge, same part but there's a left and a right. Pretty simple to use, just slip them between the springs and hang the caliper on the small hook using one of the vents.
http://www.dieseltruckresource.com/pics/data/500/medium/Rear_brakes_04_5_Dodge_3500_074.jpg
You can see one of them at work in this picture.
http://www.dieseltruckresource.com/pics/data/500/medium/Rear_brakes_04_5_Dodge_3500_005.jpg
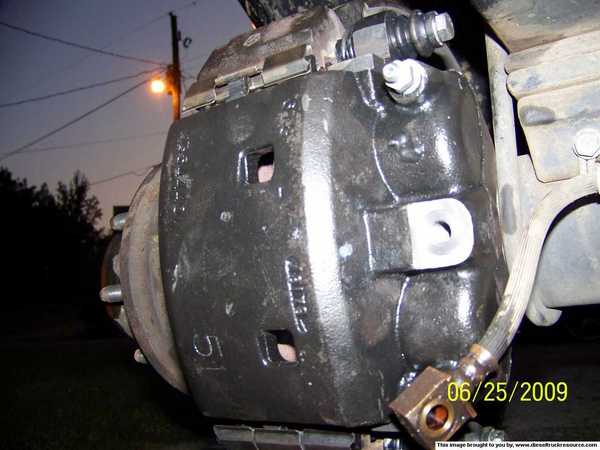
Unfortunately, I ended up having to pull and replace the calipers so I could have done it allot easier. FWIW, after wrestling the caliper out of the mounting bracket, I chose to just remove the mounting bracket as well. You don't have to pull the bracket to get the rotor off but it's allot easier to work with and re-install the caliper that way. If that's your choice as well and you are replacing the calipers or pulling the rotors, start by prying the pads back just a little and then break the mounting bolts loose. Before you remove the bolts completely, take the brake line loose from the caliper. That way you won't strain the flexible hose and you can get the whole assembly out of the way.
http://www.dieseltruckresource.com/pics/data/500/medium/Rear_brakes_04_5_Dodge_3500_051.jpg
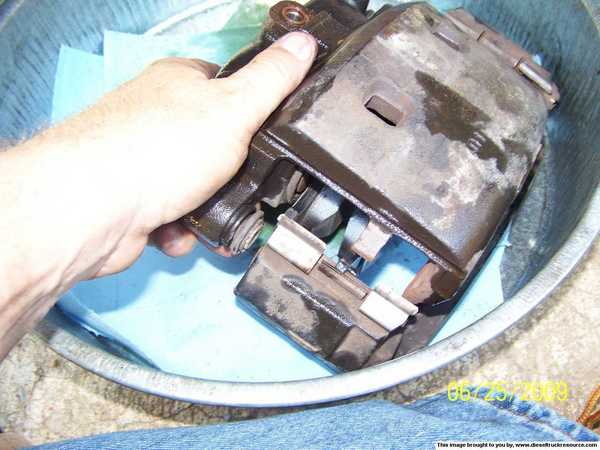
You'll want to put the caliper in a pan to work with it any further as it will be messy from this point on. In this picture I've already removed the slide pins that attach the caliper to the mounting bracket and started to pull the caliper loose from the mount. On the caliper you'll notice a single tang or tooth looking appendage sticking out from the bottom. Think of this as a latch.
http://www.dieseltruckresource.com/pics/data/500/medium/Rear_brakes_04_5_Dodge_3500_021.jpg
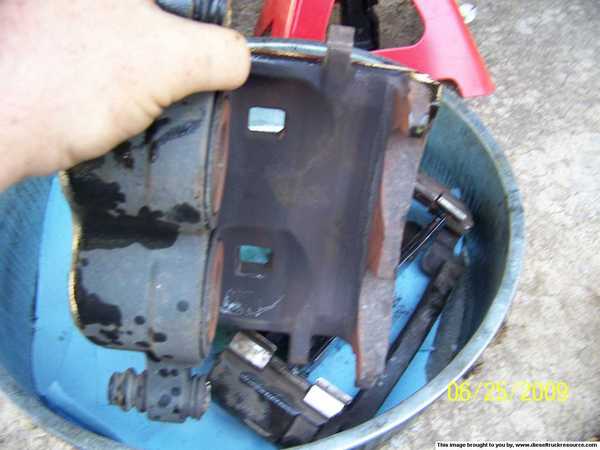
In this picture you can see both ends of the caliper. The single tang or latch, is at the top now. There are two tangs on the other end. Think of them as a hinge. When you reassemble these two parts later the hinge end goes into the mounting bracket first and then the latch end just snaps in. We'll talk about this again later as we re-assemble the brakes.
http://www.dieseltruckresource.com/pics/data/500/medium/Rear_brakes_04_5_Dodge_3500_022.jpg
Like I said earlier, there is more than one way to take the brakes off the truck. You may also chose to pull the line loose and remove the caliper leaving the mounting bracket. Which ever way you chose, just take your time and mind how much strain you put on that flexible line. One other thing, if you remove the caliper from the truck and are going to re-use it, you will need to replace the copper washers that seal the banjo bolt to the hose and caliper. There are two washers per caliper. I discuss them later in the re-assembly. Once you have the calipers out of the way we'll proceed on to removing the rotor/hub assembly.
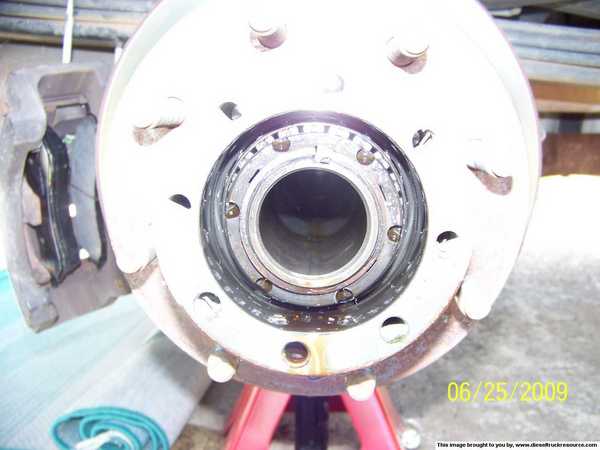
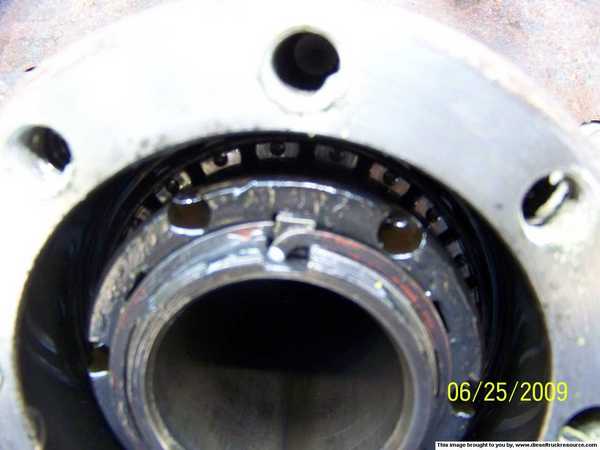
Sorry for the poor picture again. Your axle has been pulled from the tube and we're ready for the next step. At the top of the tube you can see the square key that keeps the bearing jam nut from backing off. Holding the key in place is a circular piece of spring steel (retainer) that locks into the threads of the axle tube. You can use a small screwdriver to pop the retainer off the tube. Take your time and do not bend this part. It will come off very easily.
http://www.dieseltruckresource.com/pics/data/500/medium/Rear_brakes_04_5_Dodge_3500_007.jpg
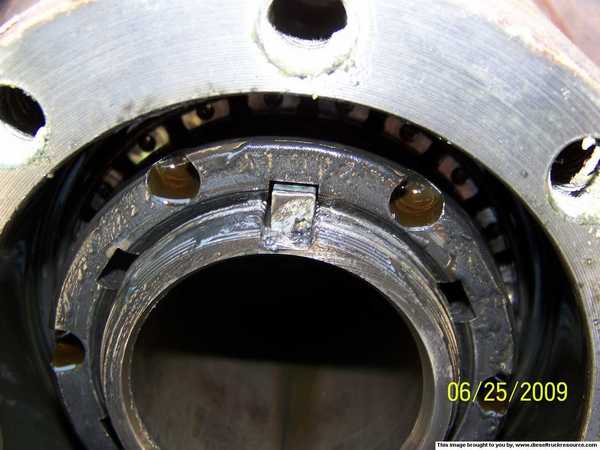
You've got the retainer off, now use a small screwdriver or pliers to pull the square key.
http://www.dieseltruckresource.com/pics/data/500/medium/Rear_brakes_04_5_Dodge_3500_009.jpg
http://www.dieseltruckresource.com/pics/data/500/medium/Rear_brakes_04_5_Dodge_3500_012.jpg
http://www.dieseltruckresource.com/pics/data/500/medium/Rear_brakes_04_5_Dodge_3500_014.jpg
http://www.dieseltruckresource.com/pics/data/500/medium/Rear_brakes_04_5_Dodge_3500_015.jpg
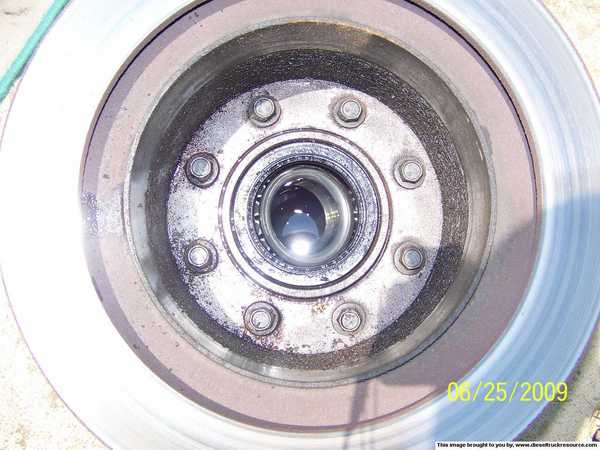
This photo is looking from the back of the rotor or the side nearest the truck toward the hub. A deep-well socket and 1/2" impact will spin these right out. They also have a chemical thread locker on them. Don't forget your PPE before you fire up that impact gun.
http://www.dieseltruckresource.com/pics/data/500/medium/Rear_brakes_04_5_Dodge_3500_016.jpg