Replacing Engine Mounts
Replacing Your Tired Engine Mounts
Original Write Up By BC847
For the last month I've enjoyed being the only Dodge diesel running down at the local track whooping the ricers. Finally, a good fella showed up with a '91 that's stock other than W/M and some Ebay PODs that run quite hot.
He got me by a nose the first pass.
We lined up for the second pass and I launched hard. So much so that my heap jumped out of gear when it went to second. I've been on the bleeding edge of run-away all along. For a second or two, . . . . or three . . . . . . . .. . I thought this boy's gonna scatter! Then I though "Put it in gear dummy!"Whew!
I took it straight home and sitting in the driveway, with the engine in gear, standing on the brakes, I built up 10 pounds of boost while watching the engine. Sure enough, I could see the engine lift up well to the passenger's side. Broke an engine mount.
Need to fix that.
As well as the FSM is written, I found it odd that when it comes to replacing the engine insulators (proper name), the book was a bit vague.
It starts with roughly: "Lift engine with special engine lift, then raise vehicle on lift so as to work from under the truck."
Yeah.
So this is what I did ~
As always ~ SAFETY FIRST!
- Chock the wheels very securely.
- Set emergency brake.
- Disconnect the Negative battery cable from the battery.
- Have a known good fire extinguisher within sight.
- Have a clean, uncluttered work area.
- Have good lighting.
- Considering you will be lifting/holding the engine with a jack be sure it's rated for the load with a good safety factor. Don't cut any corners here. When considering all this, don't forget to include a strong, level area to park the truck.
- With any work I do, I usually power wash everything the night before. If you don't have the means at home, the local car-wash works well. If you don't walk away soaking wet with gritty/grime on your face, you need to strike it again.
OK, I don't have a vehicle lift nor the special engine lift described in the FSM. According the the FSM, nothing really needs to be removed or disconnected to replace the insulators outside of unfastening the radiator's fan shroud so as to accommodate the engine as you lift it. OK, fine.
If this were a small-block Chevy, many would lift the engine by the oil pan using a floor-jack and a block of wood to spread the load. You will crush the CTD oil pan so don't think about that any further.
- Secure the truck so it can't roll any.
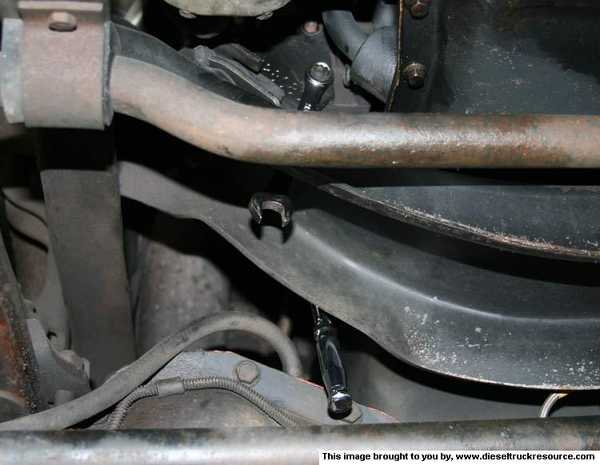
- Remove the fan shroud clips up top and lift the shroud out of the bottom clips and set it back on the fan.
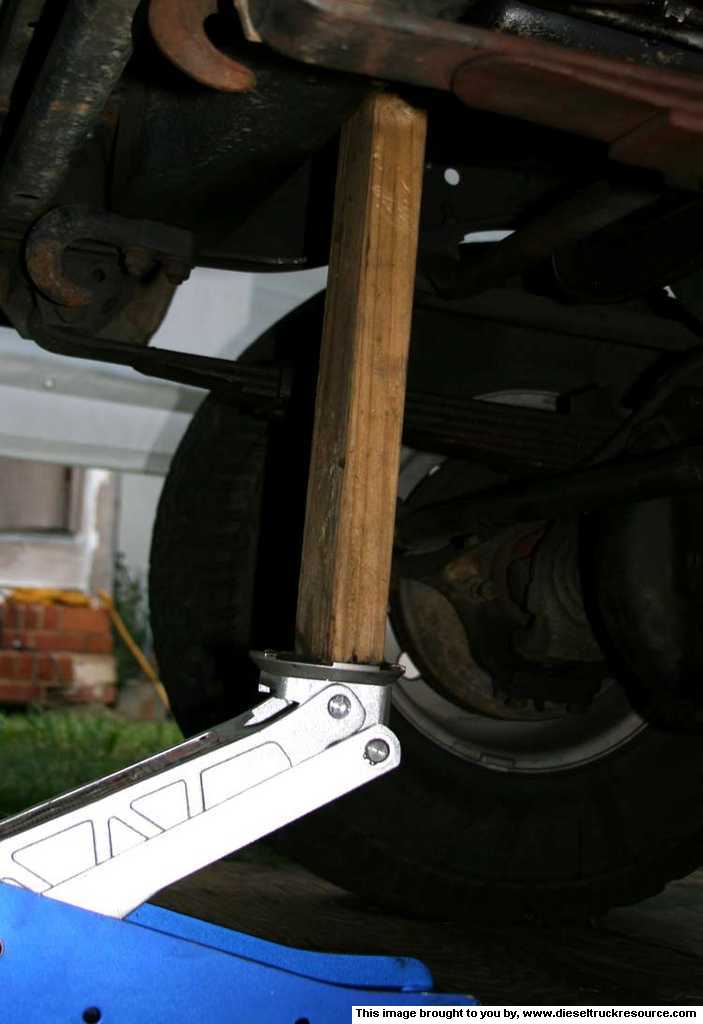
- Place a 16" or so length of sound 2x4 on the pad of a good floor-jack located directly under the crankshaft damper. ~
http://www.dieseltruckresource.com/pics/data/544/LiftEngine.jpg
- Place the other end of the 2x4 on the flange of the oil pan just behind the damper. Lifting the engine here assures us that the load is taken by the timing cover which is much more substantial than the oil pan. ~
http://www.dieseltruckresource.com/pics/data/544/LiftAtCrank.jpg
>> WARNING << Make sure the 2x4 is straight up and down when taking the load of the engine. We don't want the 2x4 slanted as it may very well shoot out from under the engine at any time. When positioning the jack, keep in mind that you may have to initially slant the 2x4 so that when you do lift the engine, the 2x4 will go straight up and down when the jack lifts.
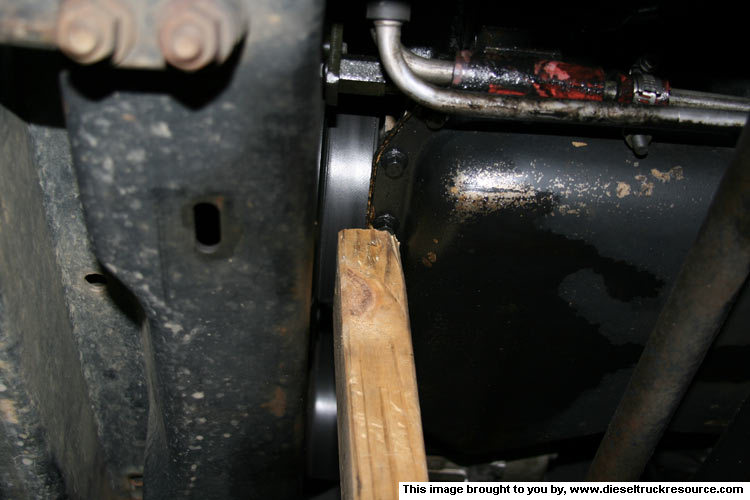
Have some scrap 2x4's to place between the oil pan and frame cross-member to catch the engine should things go bad.
- Initially, raise the engine enough to remove it's weight from the mounts.
- Remove the nuts from the lower insulator studs.
The rubber insulator actually sits on the cross-member and has a bracket bolted to it's top. That bracket bolts to the engine block. Removing the bracket and insulator as a unit makes things much easier.
- With that, we need to remove the through-bolts. (Passenger side shown) ~
http://www.dieseltruckresource.com/pics/data/544/ThroughBolts.jpg
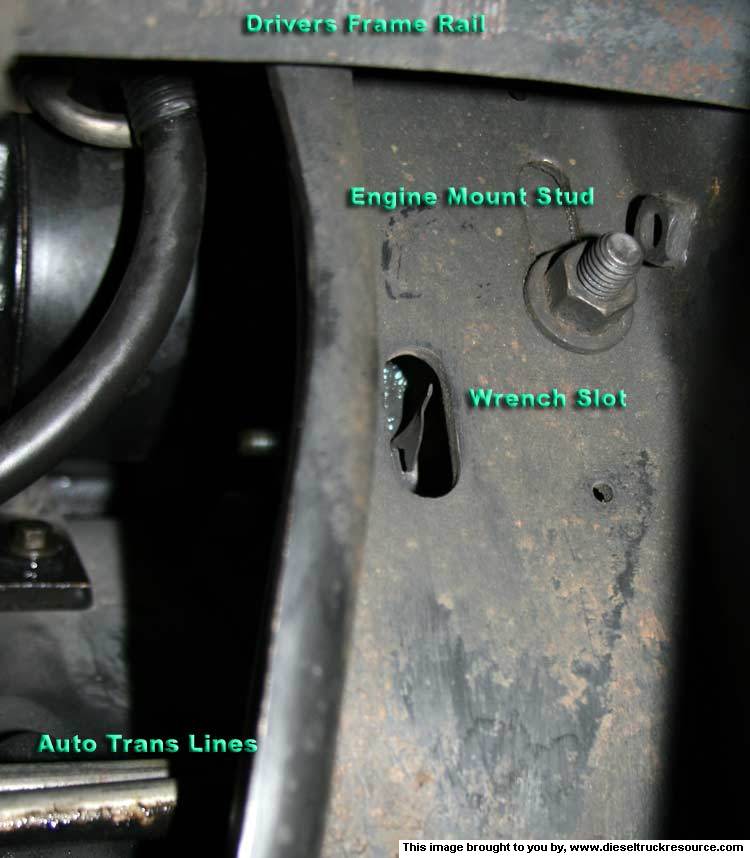
The FSM doesn't mention this but there's a slot in the frame cross-member directly under the engine mounts. ~
http://www.dieseltruckresource.com/pics/data/544/WrenchSlot.jpg
- A box-end wrench goes through the slot to hold the mount's through-bolt nuts. A socket with appropriate extensions turns the through-bolt. ~
http://www.dieseltruckresource.com/pics/data/544/medium/AccessBolts.jpg
Make sure you keep the blocks of wood between the pan and cross-member while you're removing the mounts. You don't want to be jerking too hard on things and have the engine come down on you, so be careful.
Expect to have to mess with it some to get the blame things out. Know where your fingers are all the time!
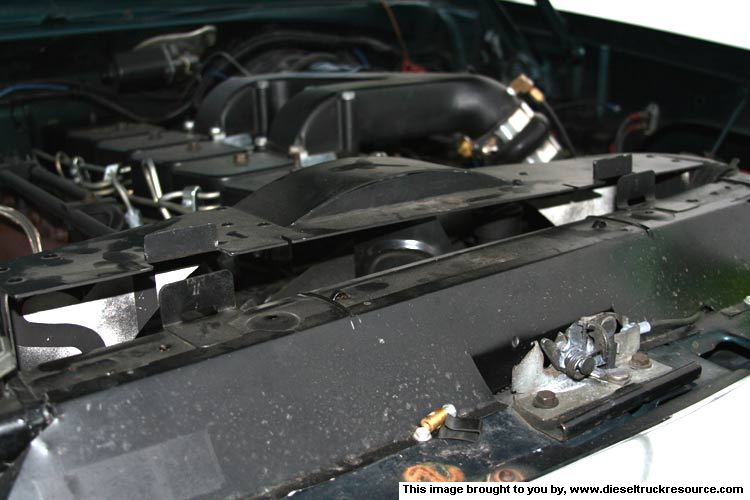
I had to lift the engine almost four inches to make room! ~
http://www.dieseltruckresource.com/pics/data/544/LiftFanShroud.jpg
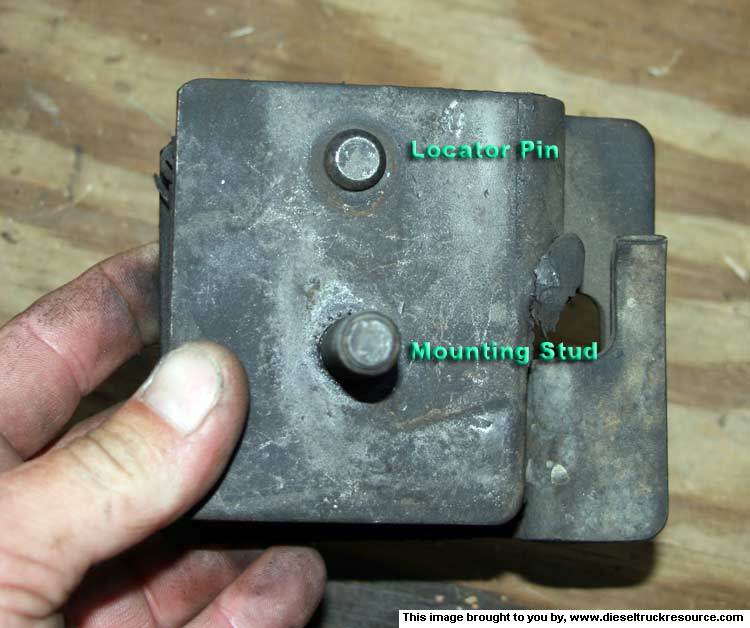
- Though I don't know that it's critical, keep up with which way the old insulators are oriented when removing so as to put things back like you found them. There's a locating pin to keep the insulators straight to the bracket and cross-member. ~
http://www.dieseltruckresource.com/pics/data/544/LocatorPin.jpg
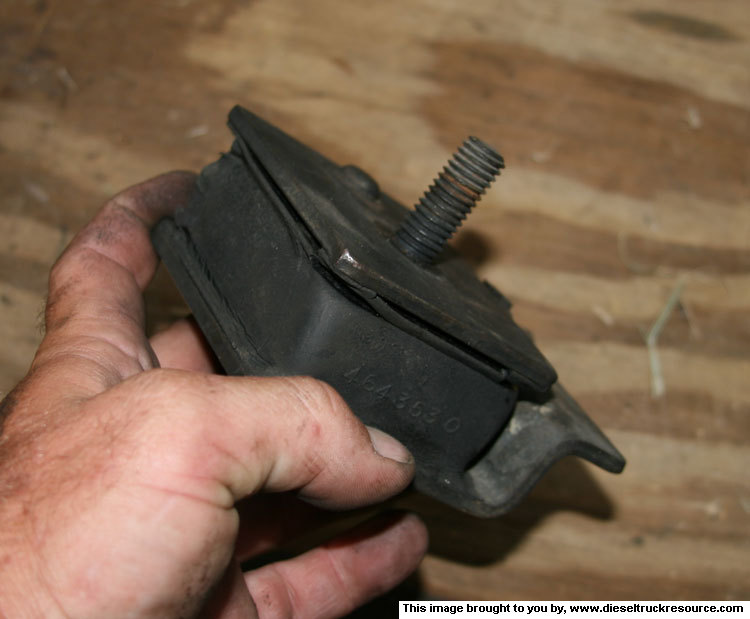
Oops! ~
http://www.dieseltruckresource.com/pics/data/544/TornIsolator.jpg
- Assembly is pretty-much the reverse of the above. Torque the through-bolts to 44ft/lbs and the insulator nuts to 80ft/lbs.
NOTE: Not all insulators are the same in quality (Click on mhuppertz's name to go to his thread for the part numbers) ~
I hope this helps those pondering this repair.
--Iker42 09:57, 10 July 2007 (EDT)