Firming Brake Pedal
Firm Your Brake Pedal With Wire Braided Hoses
Original Write Up By BC847
Folks, this isn't so much a "How To" as it is a Primer for the installation of Stainless Steel Braided Brake Hoses. Should you decide to make this upgrade, there's a good chance you might get snagged by the Gotcha! that got me.
As part of a recent brake system overhaul, I included replacing the OEM reinforced rubber hoses with some wire braided type. In most cases, they prove much less likely to expand under the normal operating pressures as compared to OEM. That translates to a firmer pedal as well as a quicker system overall.
The thing I ran into is that when it comes to these braided hoses, coupled with the age of our line of trucks, there's a limited selection available. Those available apparently come with what I'm gonna call a Standard Mounted hard-line connector. Naturally, my heap's otherwise.
NOTE: I'm working on the typical 1993 W250 running OEM Dodge issue caliper and drum brakes. Another truck's mileage may vary though I'm fairly sure things are very similar with an older rig.
As always ~ SAFETY FIRST!
- Chock the wheels as needed.
- Disconnect the Negative battery cable from the battery.
- Have a known good fire extinguisher within sight.
- Have a clean, uncluttered work area.
- Have good lighting.
- Considering you may be lifting/holding the vehicle with a jack and safety stands, be sure they're rated for the load with a good safety factor. Don't cut any corners here. Cinder-blocks WILL kill you! When considering all this, don't forget to include a strong, level area to park the truck.
- With any work I do, I usually power wash everything the night before. If you don't have the means at home, the local car-wash works well. If you don't walk away soaking wet with gritty/grime on your face, you need to strike it again.
Anyhoot, for the most part, it's simply replacing the existing hardware.
BUT!
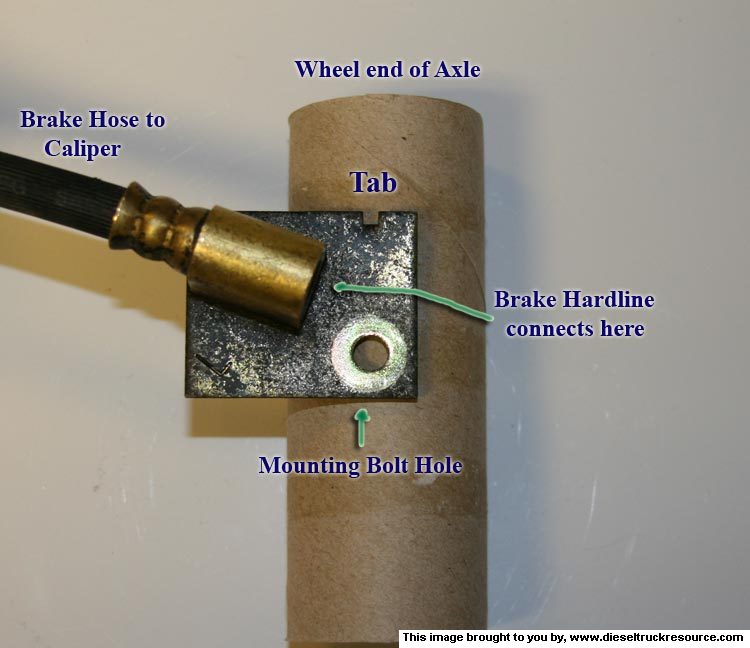
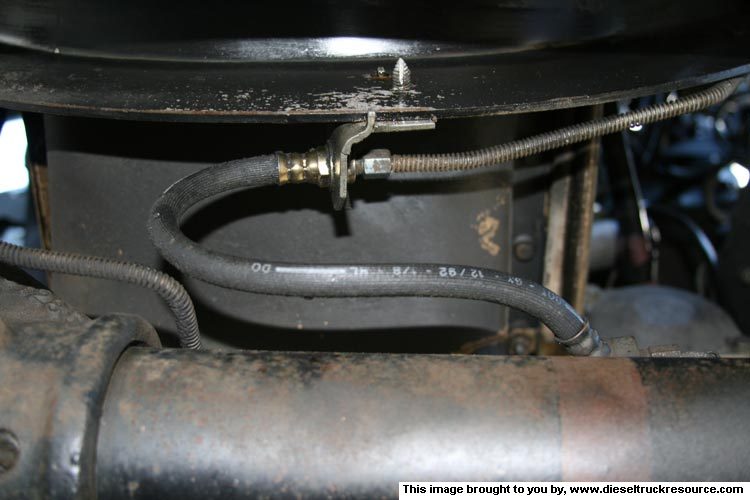
My front caliper hoses are of a design such that it's mounting to the axle involves some angles. Using space age props, I've illustrated below how my OEM hose(s) connect to the front axle.
As you can see, the hose is mounted at an angle to the axle. This is to allow proper location of the flexible hose when considering the hose extending and compressing during the act of steering the truck. The assembly is nothing more than a hose attached to a plate with a hole for a bolt. There's also a small tab that is bent down so as to key with a hole in the axle tube. ~
http://www.dieseltruckresource.com/pics/data/544/OEMHoseMounting.jpg
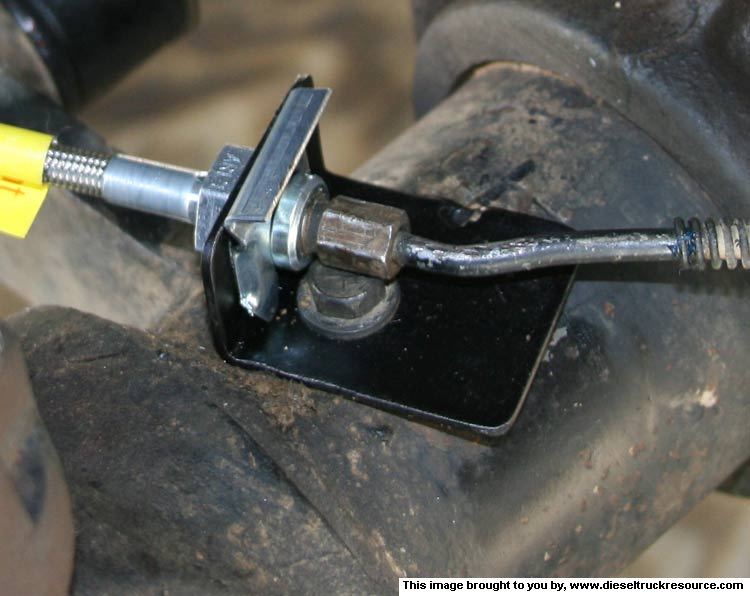
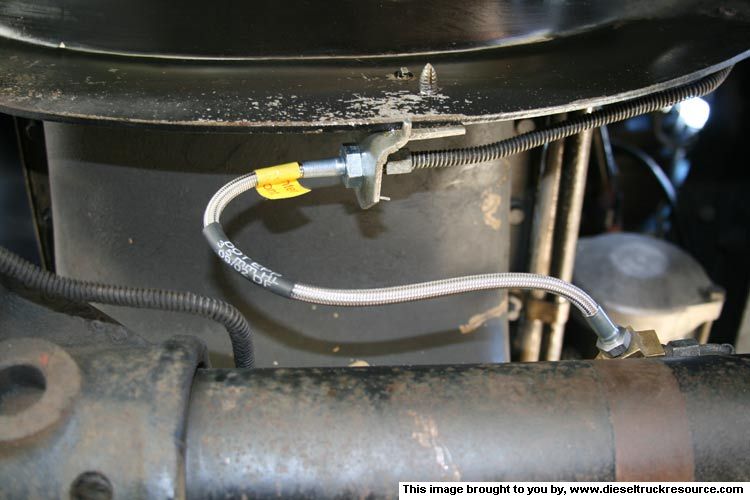
The new braided hoses don't have such a mount (at least that from Earls doesn't). They use the Standard Mount. That being the hose attach's to a round metal nut that has wrench flats on one end of it, and a groove for the typical metal C-clip found often in brake hydraulic systems. You'll see what I mean in the following images.
As such, I had to make a bracket that would mimic the OEM mounting of the hose. I had some 12ga L-stock under the barn that I cut to the appropriate length, then drilled a hole for the hose connector and mounting bolt. When it came to the TAB, I temporarily installed the bracket with it's bolt and after positioning the bracket similar to the OEM affair, using a punch, I deeply dimpled the bracket at the corresponding key-hole of the axle tube. You can barely see the dimple here. You can also see the Standard Mount of the new hose that I refer to. ~
http://www.dieseltruckresource.com/pics/data/544/NewMountTab.jpg
Folks, you need to make this bracket of substantial metal as in its normal use, the steering left and right, pushes and pulls on the mount. You don't want this to brake as your steel hard-line will break shortly there after. That's no way to get out of cutting the grass.
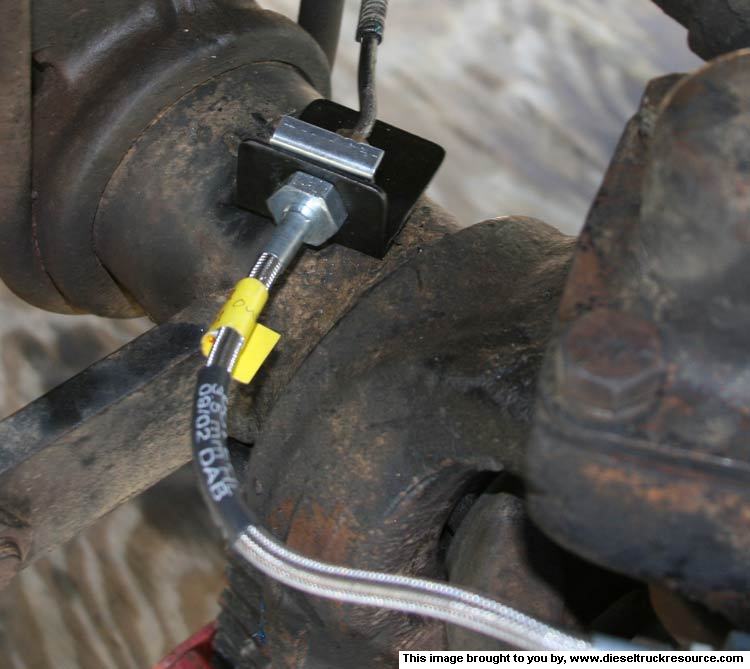
After fashioning the brackets, I rounded the corners, sanded the edges, and painted them so they'd last. My hose Kit didn't come with the metal C-clips, but your better stocked parts house should have plenty.
http://www.dieseltruckresource.com/pics/data/544/NewFrontHoseMount.jpg
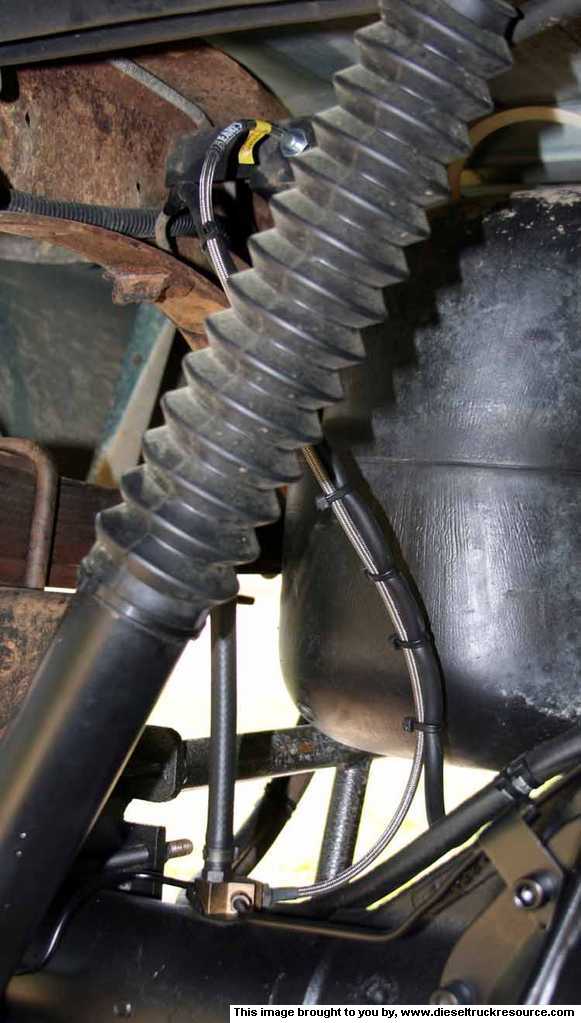
The bracket allows the new hose built to the same dimensions as the OEM to extend fully . . . . . ~
http://www.dieseltruckresource.com/pics/data/544/HoseExtension.jpg
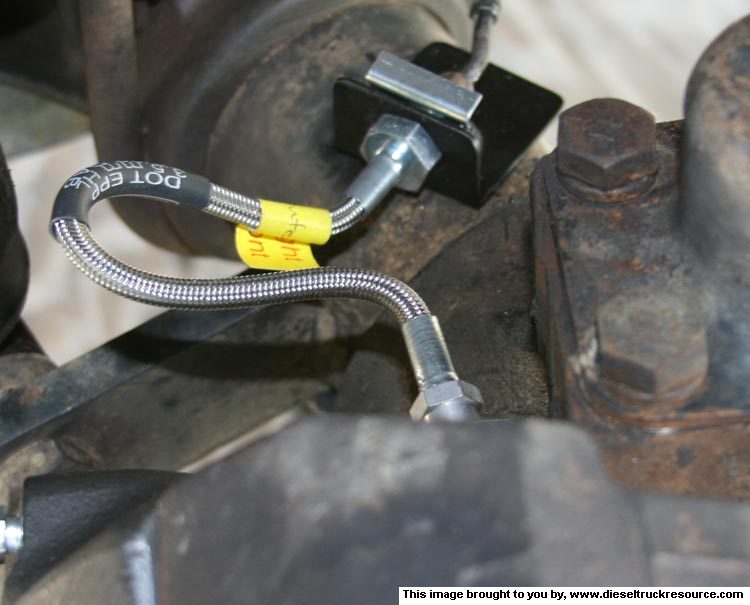
As well as Compress without undue strain. ~
http://www.dieseltruckresource.com/pics/data/544/HoseCompression.jpg
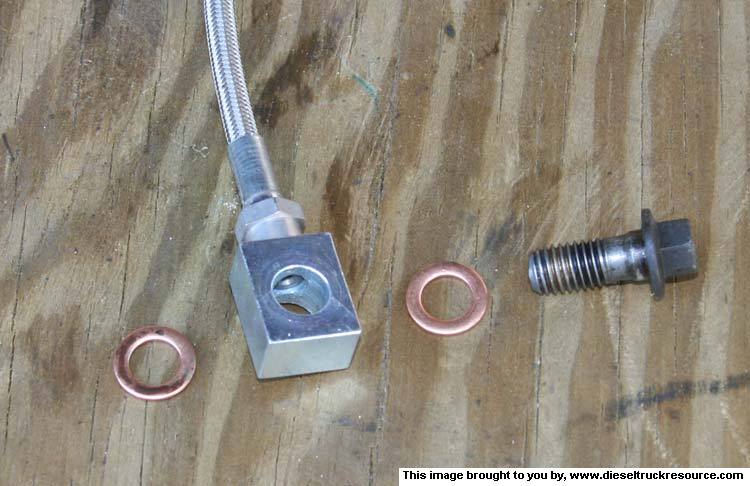
With any work on brake system banjo type fittings commonly found on calipers, always use new crush washers. ~
http://www.dieseltruckresource.com/pics/data/544/BanjoGaskets.jpg
The main front axle flexible hose swaps right out.
OEM Hose. ~
http://www.dieseltruckresource.com/pics/data/544/OEMFrontAxleBrakeHose.jpg
Replaced by the Braided. (NOTE: When removing the OEM hose mount from the axle, before completely removing the mounting bolt, sweep away any dirt under the mount so as not to allow it to fall into the axle tube). ~
http://www.dieseltruckresource.com/pics/data/544/UpgradedFrontAxleBrakeHose.jpg
That takes care of the front axle.
The rear axle is for the most part a simple swap as well. The "Gotcha" there for me was that the OEM hose is constructed so as to include mounts for the wiring associated with the rear wheel anti-lock speed sensor. It's all pretty much molded together. Mine was unfortunately rotted to the point it was crumbling. To fix that, I removed all the old mount stuff from the sensor wiring, and wrapped it all in a layer of quality electrical tape. I then split the appropriate length of typical reinforced fuel hose, and slipped it over the sensor wires. I then secured the newly made harness to the new braided brake hose with black wire ties (don't use the white variety as they don't stand up to the sun). Be sure to thoroughly secure the ends of the wire harness so as not to allow the wire to flex at each end. Let the protective hose sleeve flex.
Where the brake hose attach's to the rear axle, instead of a bolt, the axle vent tube is used to secure things. When you get to that end, be sure to check the tube assembly for any blockage as is described in this thread on how to clean it out. ~http://www.dieseltruckresource.com/dev/showthread.php?t=115036 (The front axle vent tube is similar).
I hope the image isn't too big, I wanted you to see it all as installed. ~
http://www.dieseltruckresource.com/pics/data/544/UpgradedRearAxleBrakeHose.jpg
With that, do the typical brake system bleeding:
- Rear Wheel Anti-Lock Device first.
- Right rear Wheel Cylinder.
- Left rear Wheel Cylinder.
- Right front Caliper.
- Left front Caliper.
Thoroughly check and test your brake system before getting out on the road.
With the above brake system upgrade, I'm able to sense an improvement in the quality of the brake pedal feel.
I hope this proves helpful to those pondering such an upgrade. Perhaps if only to save you a few surprises.
--Iker42 10:29, 10 July 2007 (EDT)